This is my DIY guide on how to build a metal raised garden bed. I walk you through every step of the way with my own experience to help create your own beautiful raised bed garden, merging function and beauty, especially with my passion for gardening and growing my own food.
After days of deliberation over logistics, size, aesthetics, and cost between the different types of raised garden beds, I eventually settled on corrugated metal raised garden beds. I read several other accounts across the web and planned out my own version, a combination of the best parts, plus some fresh, original ideas. This is the result.
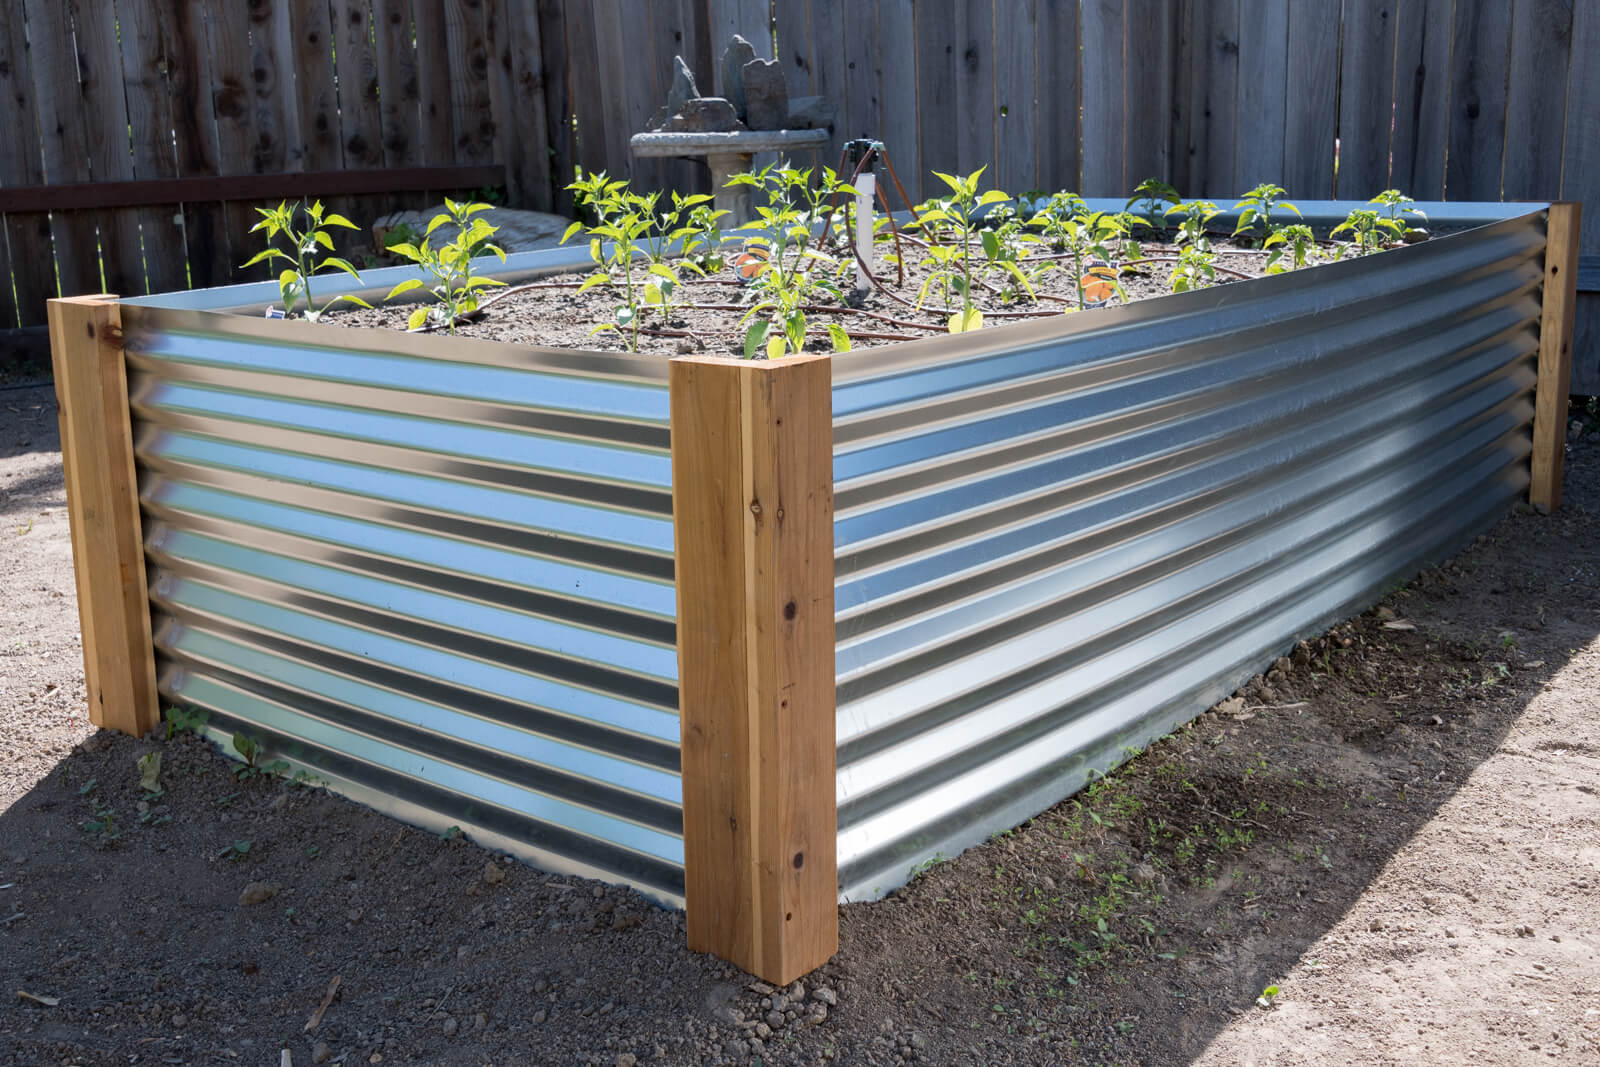
I’ve always been passionate about gardening and growing my own food, and the idea of constructing a metal raised garden bed has long appealed to me. Not only does a metal raised garden bed offer a sleek, modern aesthetic, but it also serves as a practical solution for cultivating a bountiful garden. I relish (pun intended) the opportunity to merge beauty and functionality in my outdoor space. By incorporating a metal raised garden bed, I managed to transform an unsightly corner of my yard into an attractive and productive haven for fresh, homegrown produce.
Table of Contents
Thoughts and Process
Some questions I’ve been asked and have asked myself.
Will the corrugated metal rust?
Nope – it is galvanized and will last a long time. However, galvanization is a coating on the metal. I’ve broken that layer when cutting some of the pieces and drilling holes with the screws. I’m not sure how fast rust will spread, but I am now on my way to finding out!
How hot does the metal garden bed get?
So far, I’ve felt the metal in 90+ degree weather. It remains fairly cool to the touch. Partially the galvanization and partially insulation from the soil on the other side. It still has a wicked glare, though.
How does this affect frozen soil?
While I don’t live in a growing zone or climate where the soil has frozen, I was told raised beds mean warmer soil sooner, increasing the potential growing season.
Are the sheet panel edges sharp?
The precut edges aren’t sharp at all. They haven’t cut me yet and I’ve gotten pretty wild with handling them. The edges I cut with the reciprocating saw are wicked sharp. That was part of the reason for using wood corners on the outside instead of inside.
Why is the raised bed so high?
Mostly aesthetic, partially so I don’t have to bend over as far when picking shorter plants like chilies. Having a higher bed also provides a bit of disease resistance.
Where can corrugated metal sheets be purchased?
These are in the roofing section of your local home improvement or hardware store. They generally come in 8 foot, 10 foot, and 12-foot sections. I based my size on what would create the least amount of waste or leftover materials.
Are galvanized steel garden beds safe?
Absolutely! There is nothing in part of the galvanization process and steel process which will leech and harm you through the foods you grow. Zinc (from the galvanization process) poisoning comes from inhaling the metal, not ingesting it. You will hear about galvanized steel not being safe when you are cooking with it. Soil and metal garden beds are completely fine.
Planning the Metal Raised Garden Bed Layout
This whole project started when I had 3 large trees die and come down in the yard freeing up tons of potential sunlight space. I wanted to slowly tackle the yard in stages, and home-grown food was a priority. With a kind of L-shaped open area between grass, bulbs, and the fence, I had a large stump to work with.
To help guild the layout and maximize potential sunlight, I put down several bricks at different parts of the day, marking shady areas. After several days of adjusting bricks to ensure the beds were in the sunlight for the most amount of time, I had a basic area to work with.
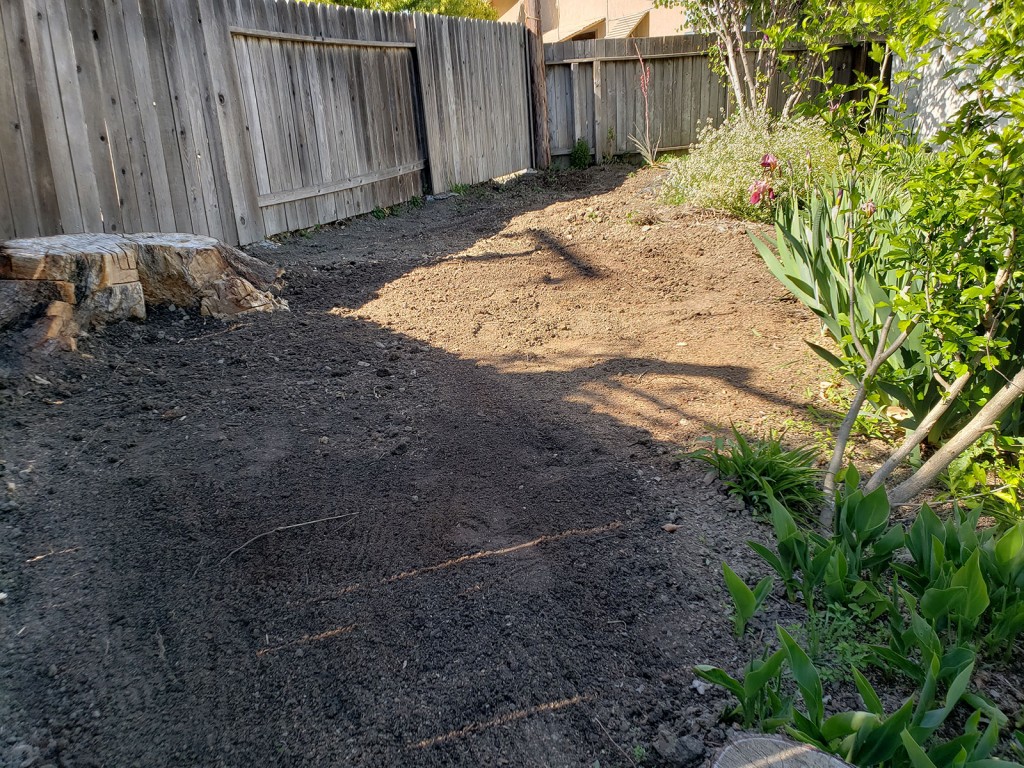
I took the time in between evaluating shade to level and grade this entire area. I also pulled up a lot of very large roots from the tree in the process. As for the weeds? One of my favorite tools is a sharp hula hoe. In addition to destroying the root systems of weeds, it tills the soil.
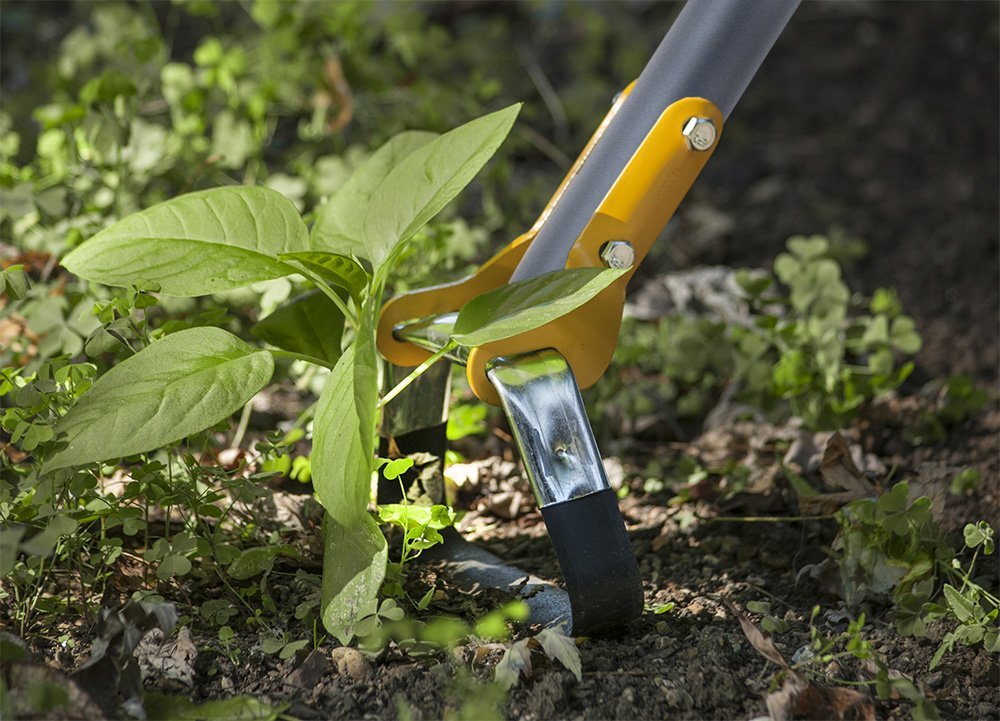
The shade ended up being in the perfect spot for me. I had enough of a buffer between the planned beds and fence to walk and tend to plants, which happened to be where most of the shade fell.
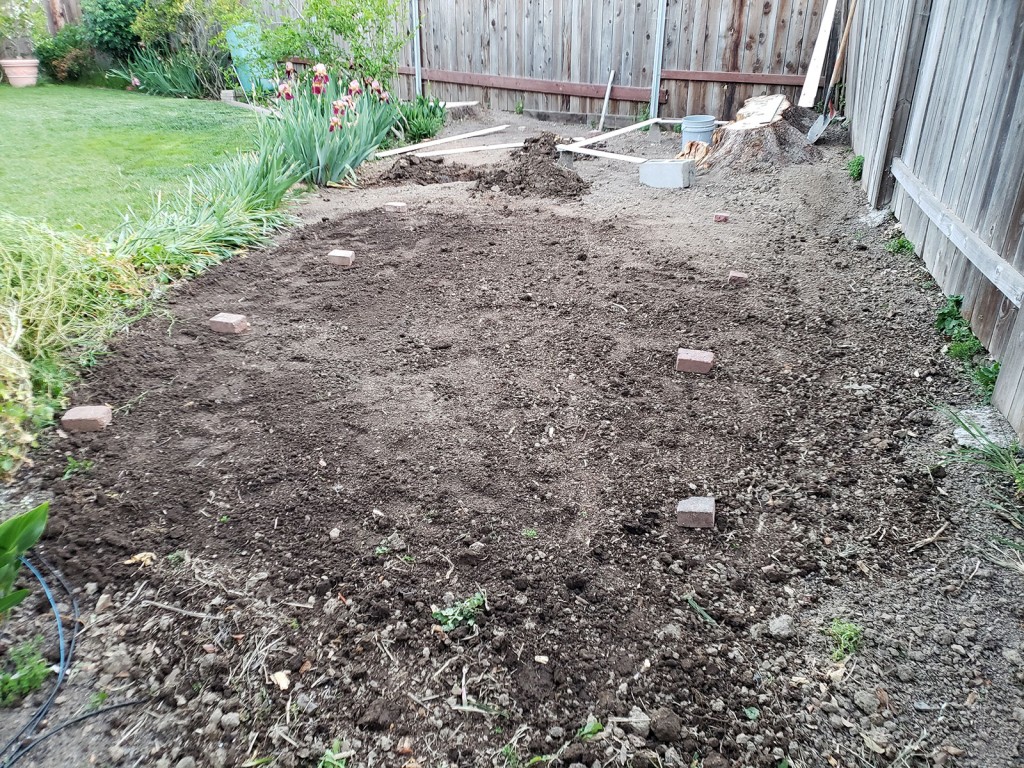
I lucked out with my bulbs as well. I knew the metal raised garden beds would be 8 feet long, based on metal sheet and lumber sizing in order not to have waste. The bulbs were 11-15 feet from the fence, providing enough room on each side for beds.
Leaving 4 feet width for each bed and 3 feet between them for walking, I found I would be able to fit 3 raised beds between the large stump and the shaded areas. That is 96 square feet of growing area. 96 more than I had before!
With bricks placed on each bed corner, distances between metal raised garden beds measured for comfortable walking, and making sure things were aligned in a way that looked good from multiple angles, I began trenching for irrigation.
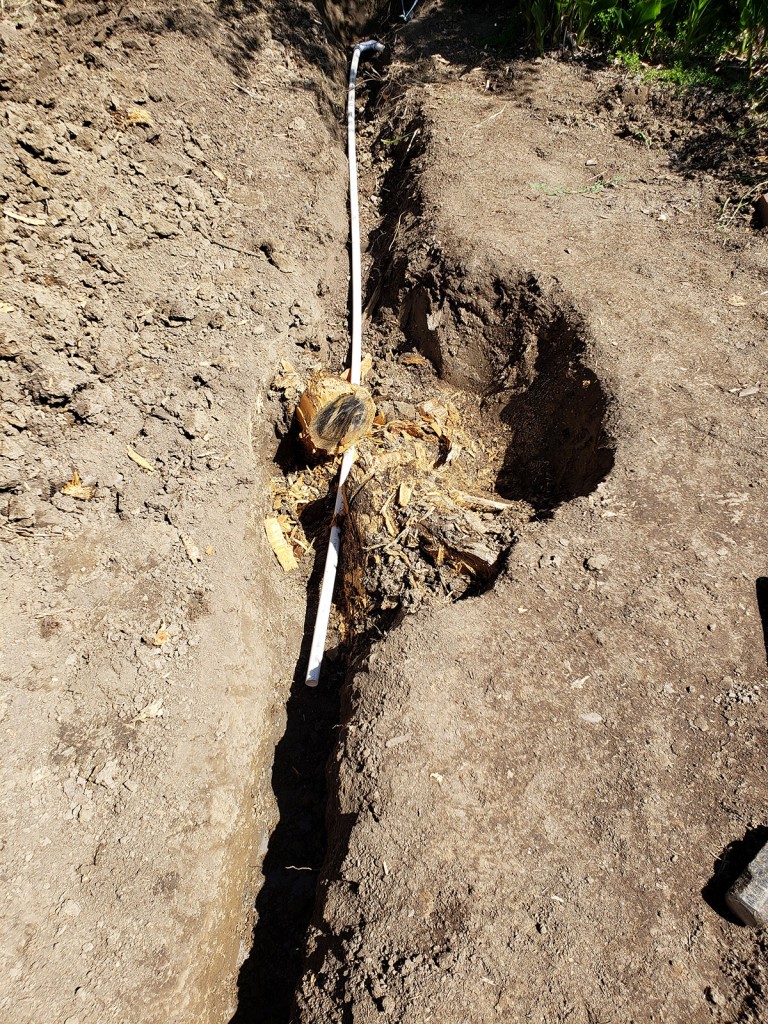
You know those roots I mentioned. Yeah. This happened several times. It also screwed up my wonderfully leveled area. I laid down piping like this to make sure I was digging mostly straight. Let’s just say I use the term “straight trenches” very loosely. I’m also making sure to post my mistakes to properly dissuade any friends (Robert) reading this from asking for help. After filling in the trench, I have to admit I got pretty lazy on re-leveling the area. I found out just how bad I not-leveled later on.
With a lot of measurements taken, trenches dug, and an idea of how many raised beds I could fit in the area, it was time to go shopping. As an experienced DIY’er, I know that any project has a 3-trip minimum to the hardware store. I always overbuy small parts. Its terrible to have to make the drive back to the store for one measly 29 cent part.
Plans for Raised Metal Garden Bed Materials and Supplies
I wanted to use screws that would blend in with the wood, so I opted for red star-headed screws.
For wood, I ended up with redwood based on availability, although cedar would have been a great option as well. I am one of those people that spends a ton of time bringing down half the pallet of lumber evaluating curves and how dry each piece is. And yes, I put it all back. I bought 16′ pieces, but you can buy 8′ as well and double the amount appropriately.
I wanted to get some kickass soil for my new raised beds, so I got a “veggie mix” which was comprised of “premium” organic topsoil, humus, mushroom compost, sand, lava fines. Each bed needed 2.25 cubic yards per bed, but I also wanted extra for some other garden areas while I was getting it delivered.
While corrugated metal was the main project, I also opted to get some pavers and build a 4th bed in order to deal with a strangely shaped area and large stump, which had me stumped for ideas. Yeah, I just went there.
In addition to building the metal raised garden beds themselves, I wanted to redo my irrigation and reroute some of the underground piping to each bed. I always buy new cement and primer for large projects, as I usually go a ways between irrigation fixes and the PVC cement expires quickly.
The adapters and connectors purchased were on a case-by-case basis. I already had some parts and had to get more than necessary in other areas. You shouldn’t follow my irrigation purchases exactly.
Irrigation Protip: If the cement is jelly or gel-like in the least bit, it has gone bad. The cement should be very runny.
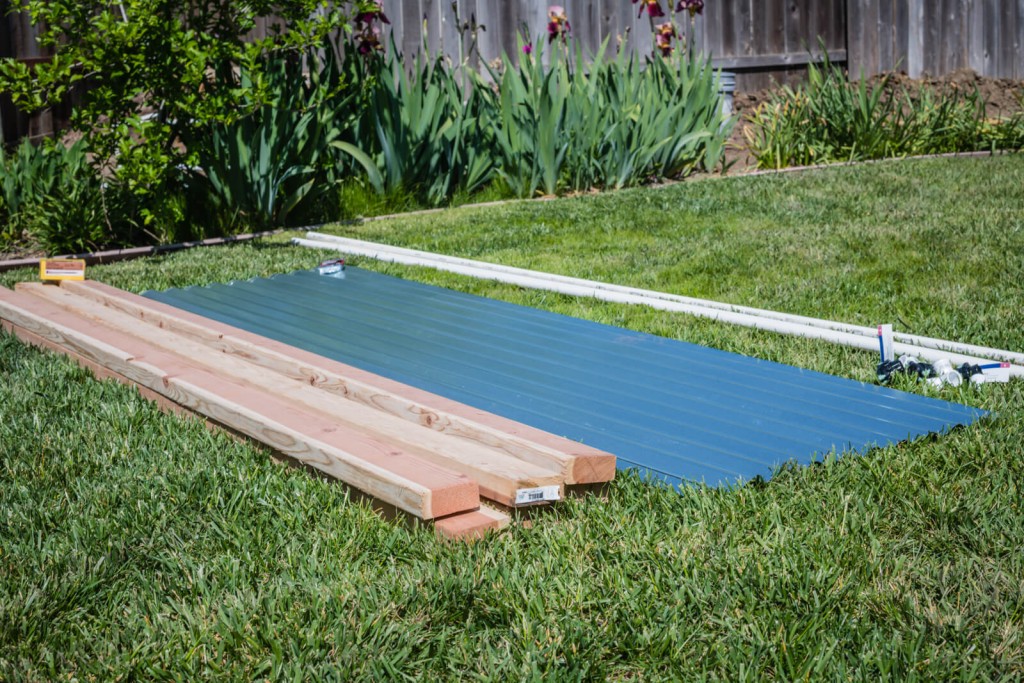
List of materials for 3 metal raised garden beds:
- Raised bed: 8′ corrugated metal galvanized – 9 pieces – $157.32
- Raised bed: 5 pound pack Exterior Screws, 3″ x #10 – $30
- Raised bed: #8×3/4″ self drilling pan sheet metal screws – $9
- Raised bed: 2×4-16′ redwood – 3 pieces – $57.81
- Raised bed: Soil compost mix – 6.75 yards – $350
- Raised bed: Tan pavers – 60 pieces – $31.18
- Irrigation: Purple primer – $6
- Irrigation: PVC cement – $6
- Irrigation: 3/4″ Thinwall 10′ – 3 pieces – $5.70
- Irrigation: 1/2×3/4 pvc male adapters – 3 pieces – $3.42
- Irrigation: 3/4 pvc el45 slips – 2 pieces – $2.28
- Irrigation: 3/4 pvc 90 degree elbow – 3 pieces – $1.41
- Irrigation: 3/4×1/2 pvc bushing – 2 pieces – $1.92
- Irrigation: 3/4″ pvc coupling – 2 pieces – $0.95
- Irrigation: Manifold with adjustable flow 4 outlets – 3 pieces – $19
- Original when I first built Total cost: $681.51. Without the soil, that is $110.40 per bed.
Tools and Equipment Used
- Electric drill for pre-drilling holes
- Hammer drill for screwing
- Pipe cutter for pvc pipe
- 12″ Miter saw for cutting wood
- + carpenter’s pencil for marking wood cuts
- Reciprocating saw for cutting corrugated metal
- + sheet metal blades
- + Sharpie for marking corrugated metal cuts
- 9″ Torpeedo Level to make sure things are mostly even
- 48″ Beam Level for the larger raised bed pieces
- Tape measure to measure twice and still go back to the store.
Estimated Time
- Planning, thinking, measuring, prepping land: 5 days
- Irrigation setup: 3 hours
- 3 raised beds materials purchase and assembly: 1/2 day
- Moving dirt: 1 day
- Planting: 1 hour
Irrigation
The plan was to run 3/4″ lines from 2 main pipes. Based on the distance and roots discovered, I didn’t want to feed all three beds from the same line. I also wanted to minimize the number of elbows I would need to fit. If I had to dig around in the future, simplifying the lines would make this easier to not break things.
I discovered another secret to plumbing irrigation. I wanted to photograph some of the process for this blog, so I managed to convince my dad to do a lot of the work for me. I told him the entire point of my blog was a long-term plot to get him to do the shitty part of the work for me. I like to think it worked.
He started by priming both ends of the pipes. When connecting multiple pieces together, try to do them all at once and quickly. You must wait 15 minutes before moving them around to allow the cement to cure. If you have to do 4 or 5 pieces on a strange turn, as pictured below, that can be a lot of wasted time.
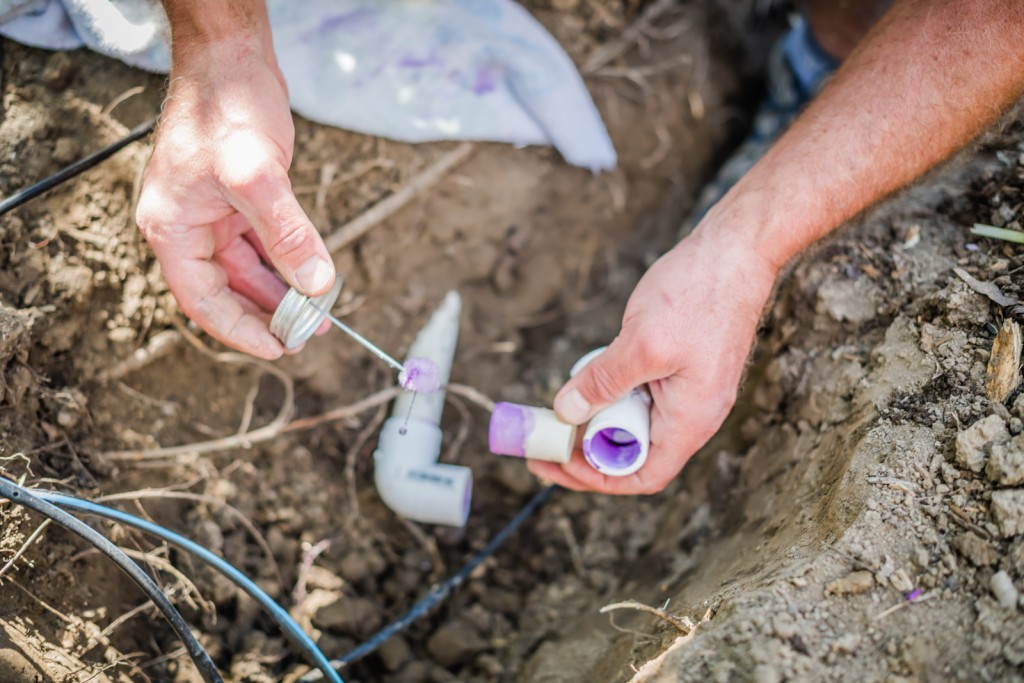
You’ll also want to keep a couple clean rags nearby. A clean work area and clean pipes will ensure you have a problem-free process. After applying the purple primer, add on a nice thick gob of cement, covering all sides. Try not to inhale. Push the fittings together and hold them together tightly for about 20 seconds. This is a good time to ensure things are straightish and aligned correctly. You won’t get another chance unless you want to cut and redo things.
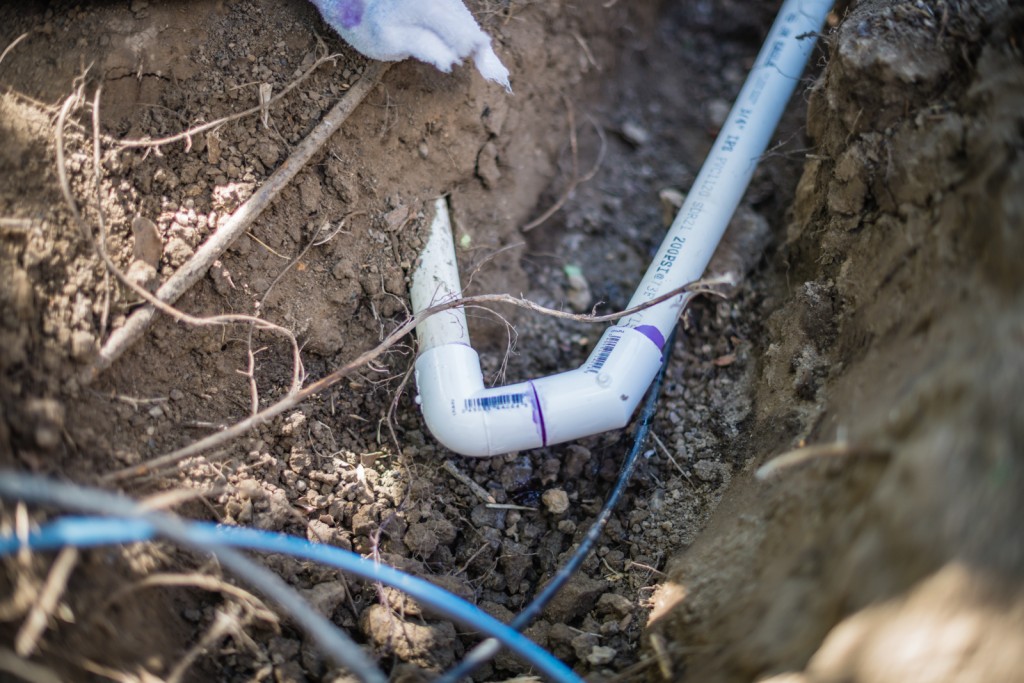
I somehow managed to plan the beds with the biggest root found right where I wanted to place one of the irrigation manifolds, dead center in a bed. I adjusted for off center, but it was still a bear to get into place. Correction: It was a bear for my dad. When placing vertical pipes, it is crucial to make sure they are straight. A level is recommended to assist with this.
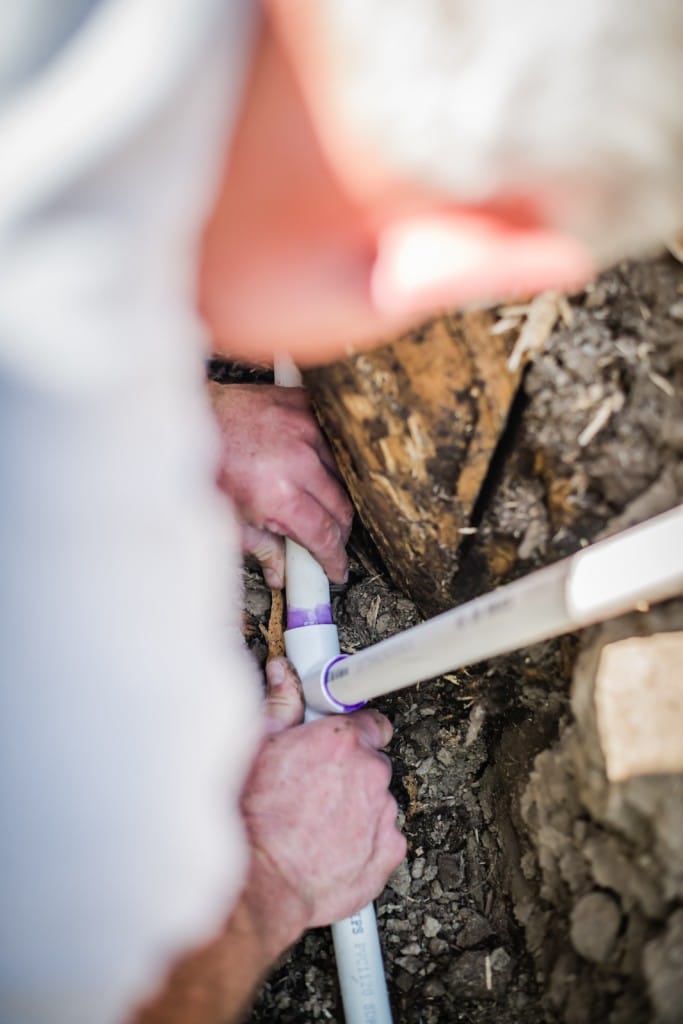
If the pipes aren’t perfectly straight, the mistake shows up immediately. Short of redoing the entire thing, there isn’t much you can do about it. I got the idea about using a level on the third pipe plumbed, featured in the forefront.
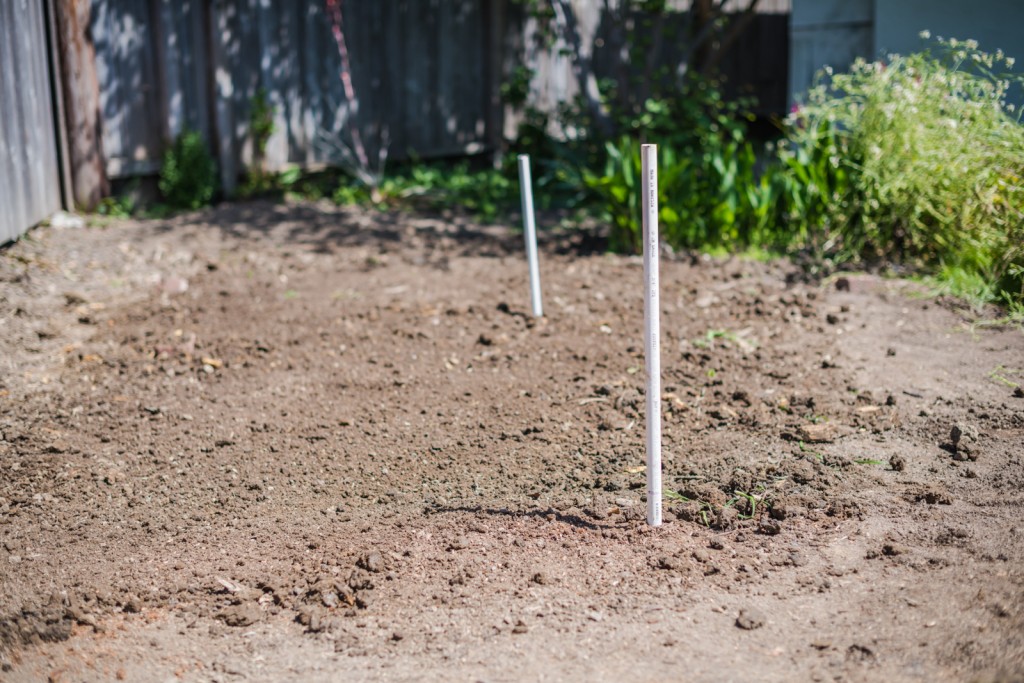
The curing process for the irrigation takes a couple of hours, which meant it was time for building the actual raised beds while the PVC cement did its thing.
DIY Corrugated Metal Raised Garden Beds
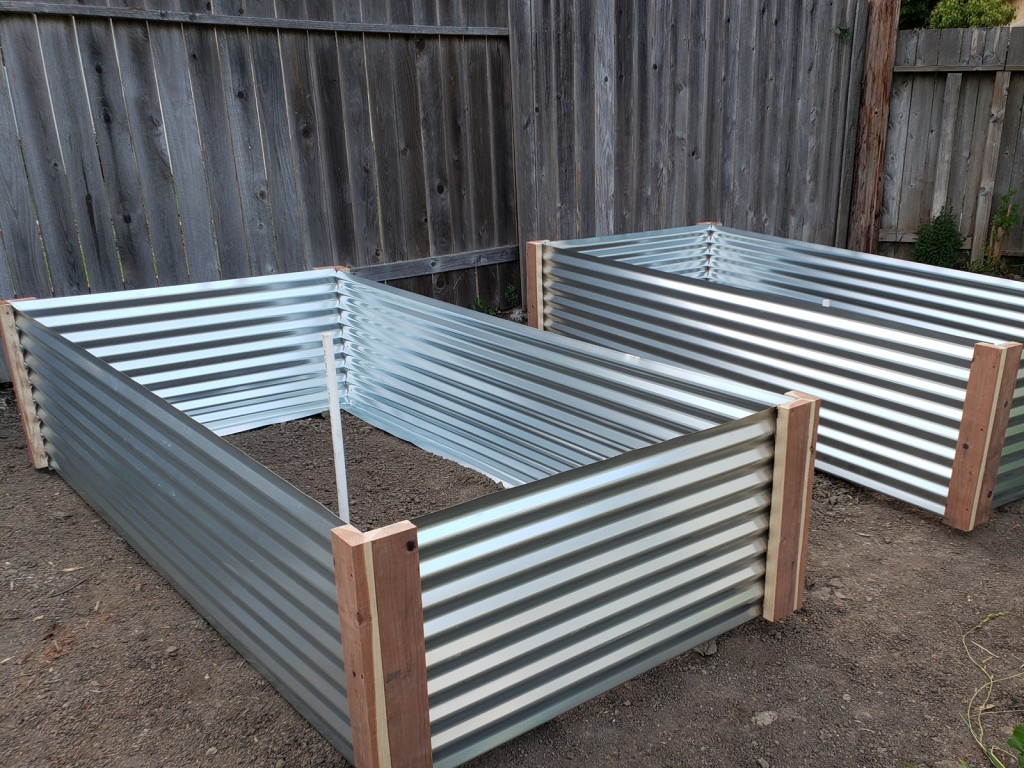
Cutting the corrugated metal panels
With x9 8 foot panels, 3 needed to be cut into 4-foot pieces for the ends. The sheets were laid out on some scrap lumber to keep them above the ground and the reciprocating saw was put to work. 4′ / half was measured out and marked with a sharpie to stay on task with the reciprocating saw.
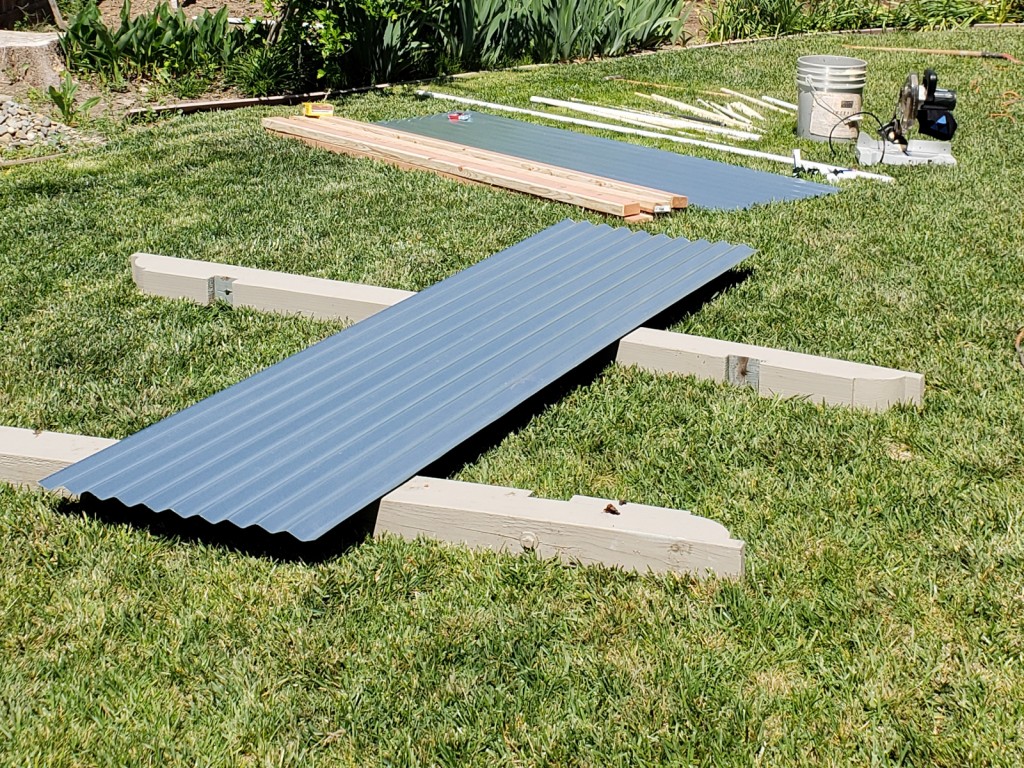
In cutting the panels, I ended up being so happy to have an extra set of hands helping. The extra pair helped in stabilizing the metal and keeping it from shaking too much from all the saw action.
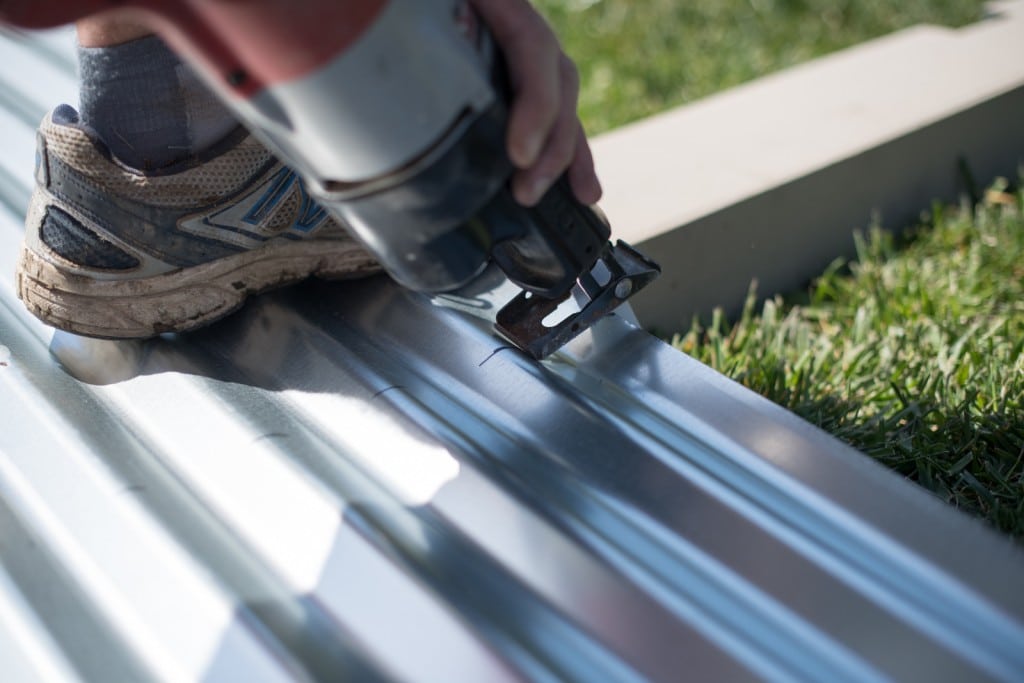
As you can see below, the cut edges are pretty sharp. The redwood 2×4 corners would serve to help mask imperfections and prevent accidental injuries.
Redwood Corners
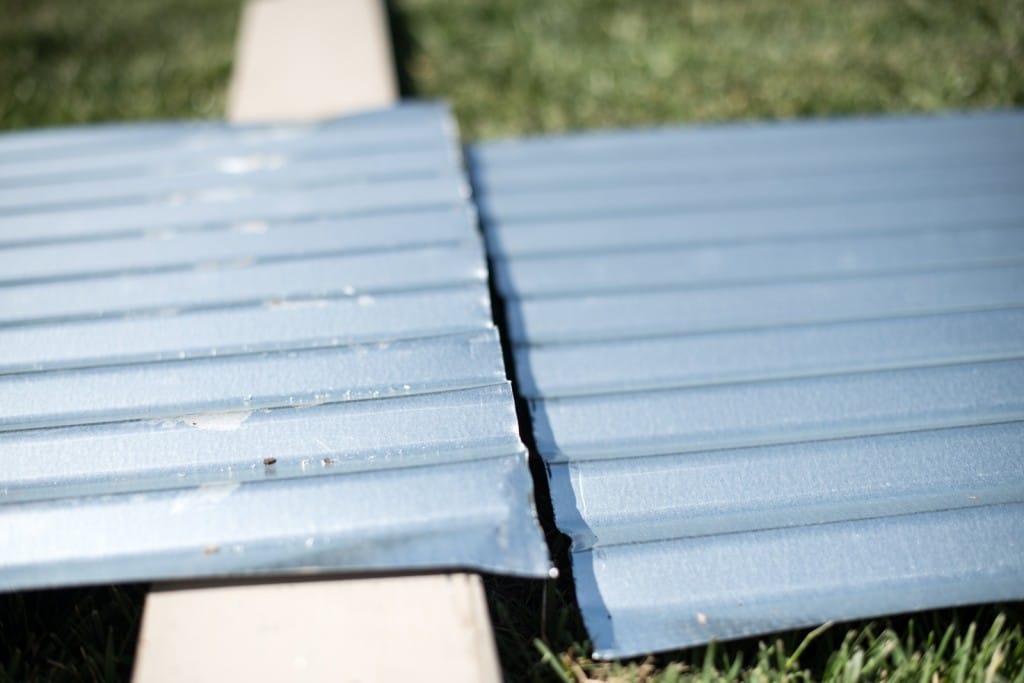
The redwood 2×4’s were all cut down into 2 foot pieces. But therein lies a problem. You’ll notice when you buy lumber, 2x4s are all slightly smaller. An 8 foot piece will yield 3 four foot pieces and a fourth slightly smaller piece, plus you have to account for the width of your saw blade removing wood. The found solution was to make sure whichever piece was short was used on the backside of the assembled bed.
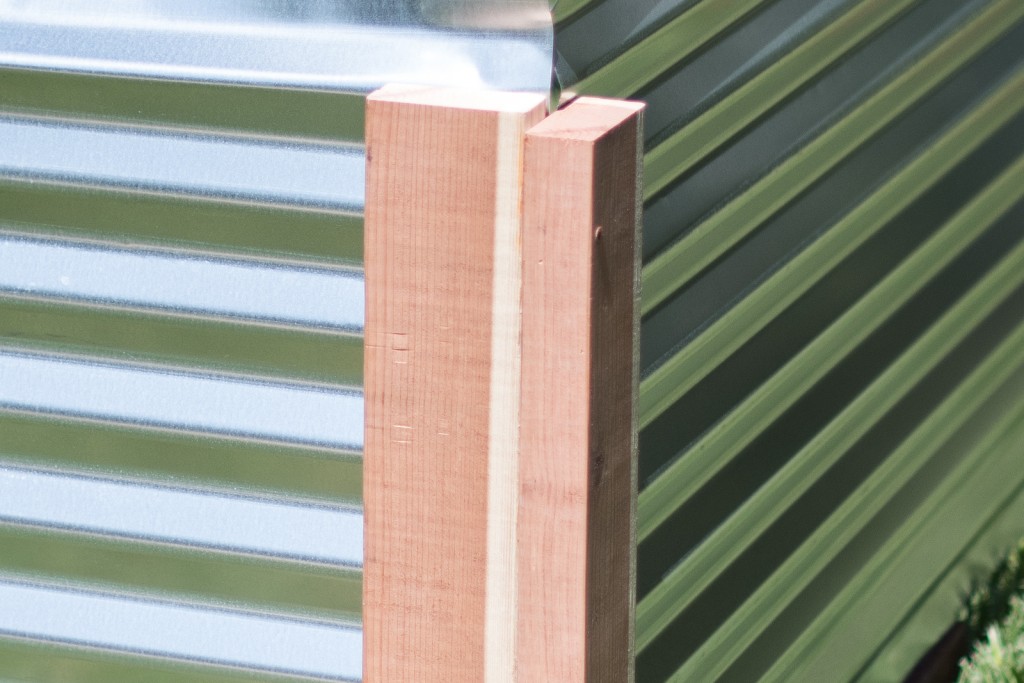
In addition, when screwing 2 of the pieces together to make a single corner, pay attention to which side of the wood is showing. Consistency will keep everything looking amazing.
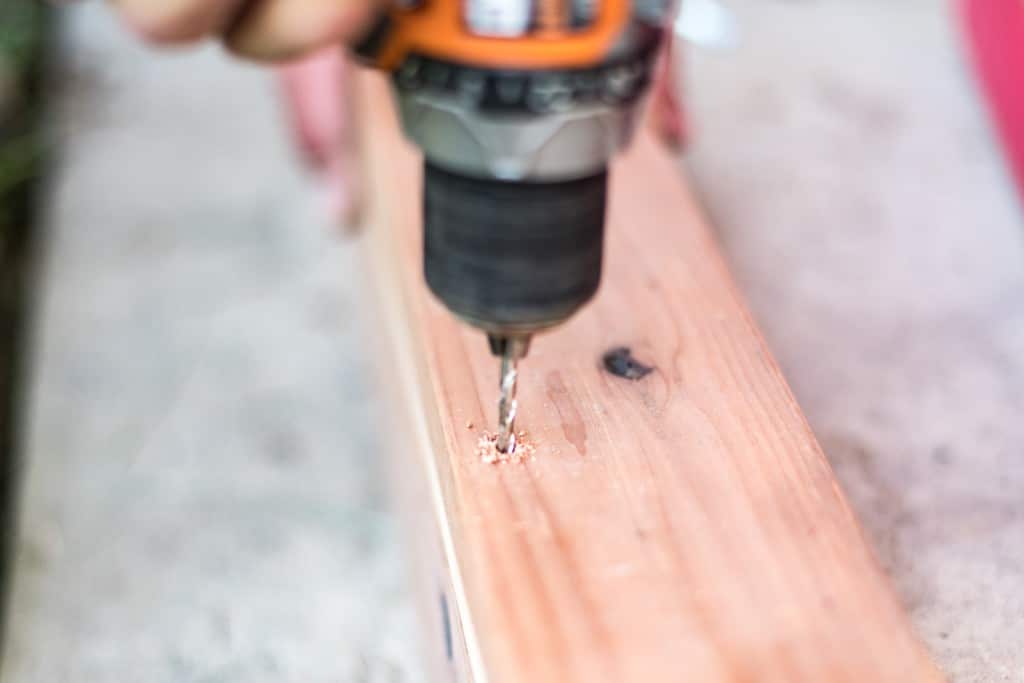
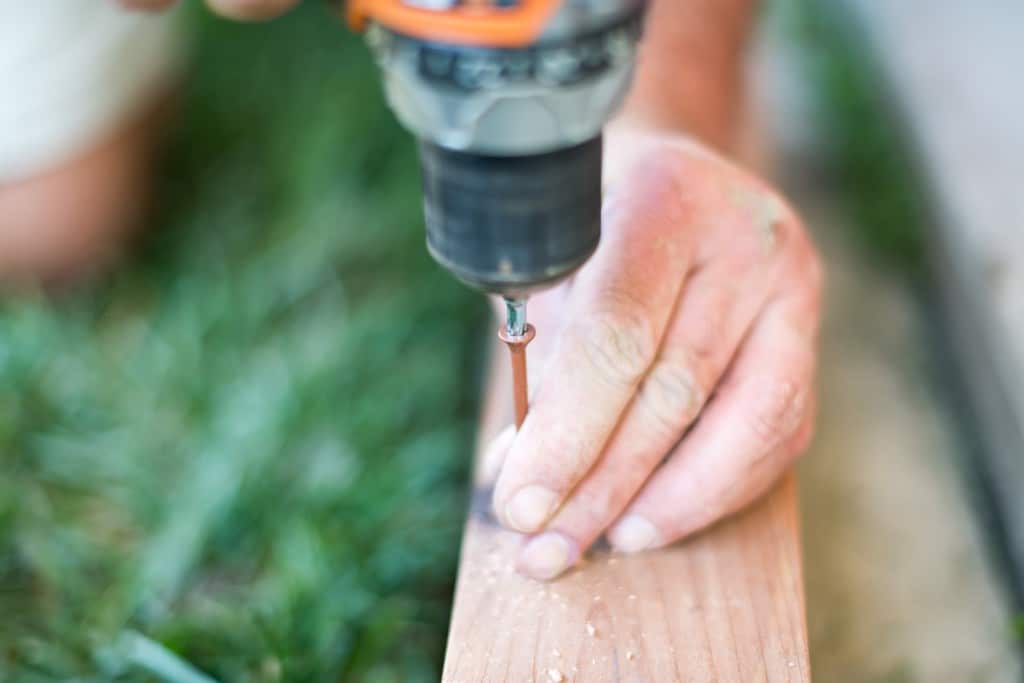
Make sure to pre-drill all of your holes to prevent the wood from splitting. This is a critical step and you will find yourself incredibly frustrated if you need to replace a single 2-foot piece. This didn’t happen to me on THIS project, but I’ve had it happen plenty of other times. This is when you will be so happy to have 2 drills going. One for drilling and one for screwing.
I did 3 holes and screws per corner.
You might be wondering why I told you to get the pax/star/torx screws. For one, they resist cam-out much better than Philips and slot head screws. Less stripping for your screwing. Uh huh. It also allows a higher torque to be used. You can reach your desired torque consistently and better drive the screw’s head into the wood without the bit slipping out when maximum torque has been reached.
Corrugated Raised Bed Assembly
With your redwood corners screwed together, law them out and set the sheets on top. Start with the 8 foot longest sides. Again, make sure you are consistent and careful with how your corners are placed. Don’t forget about the one short piece to accommodate.
You will notice the sheet extends past the length of the wood. You have 3 options for this. The least recommended is to cut the extra. What I ended up doing was making the extra bottom portion and bending it inwards.
What I would have rather done is even it out and bent both top and bottom. The bottom holds dirt and helps to keep the sides stable with the weight of dirt and water once the beds are filled. Bending the top as well would allow me to install a wood railing, adding some extra stability. I might still do something, depending on how the growing season goes.
Grab a handful of sheet metal screws and start attaching. I did 4-5 screws, attached to the inside, depending on how the sheets were bending.
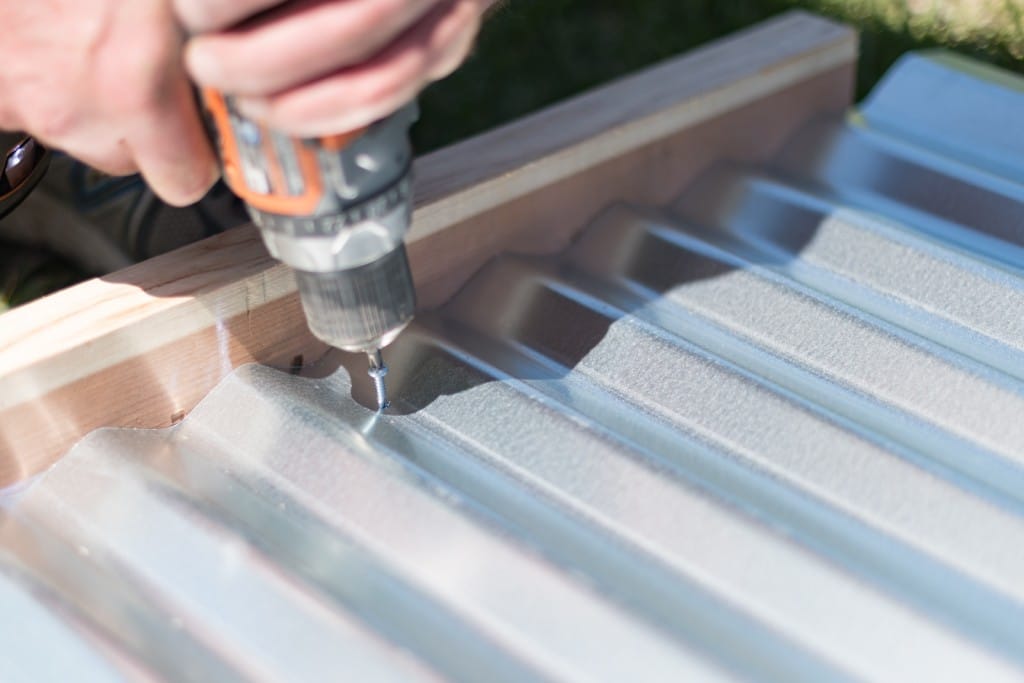
This is where having a second person helps. The person not screwing can provide counter pressure to make sure the corrugated metal is tight against the wood. Standing in the sun so shade is on the person screwing helps a lot, too.
When attaching the short metal pieces to the wood, I found placing the corners on wood to keep them slightly off the ground helped a lot. A second person holding and providing counter-pressure is key in this step. I crouched on the inside of the beds and tediously attached all sides.
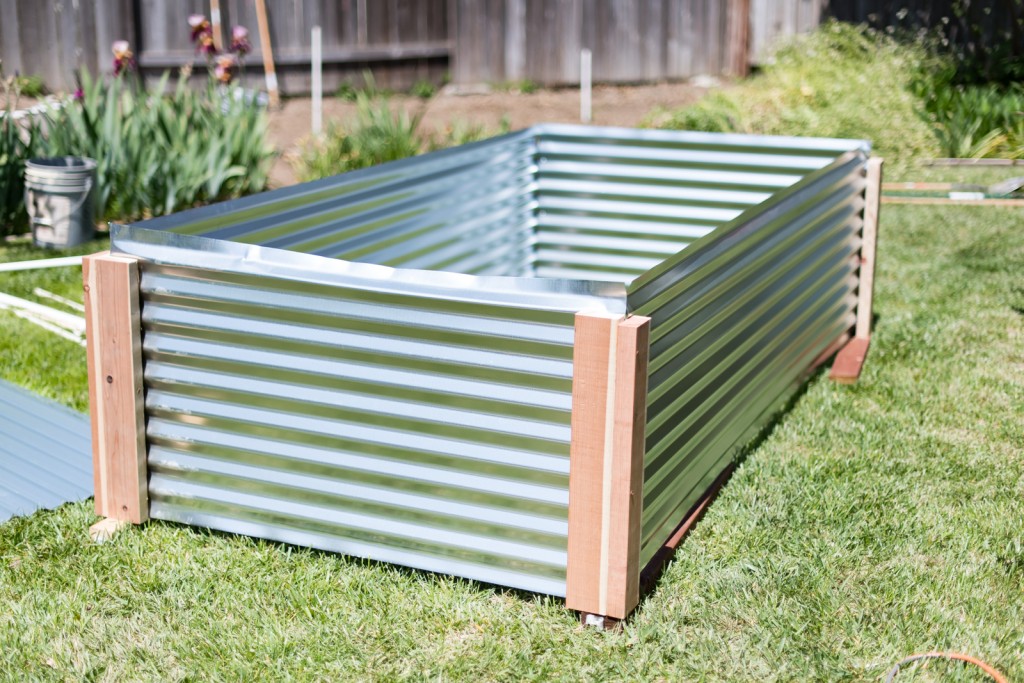
With all four sides attached, the extra metal on the bottom, facing up, was bent inwards, then attached with a sheet metal screw for good measure.
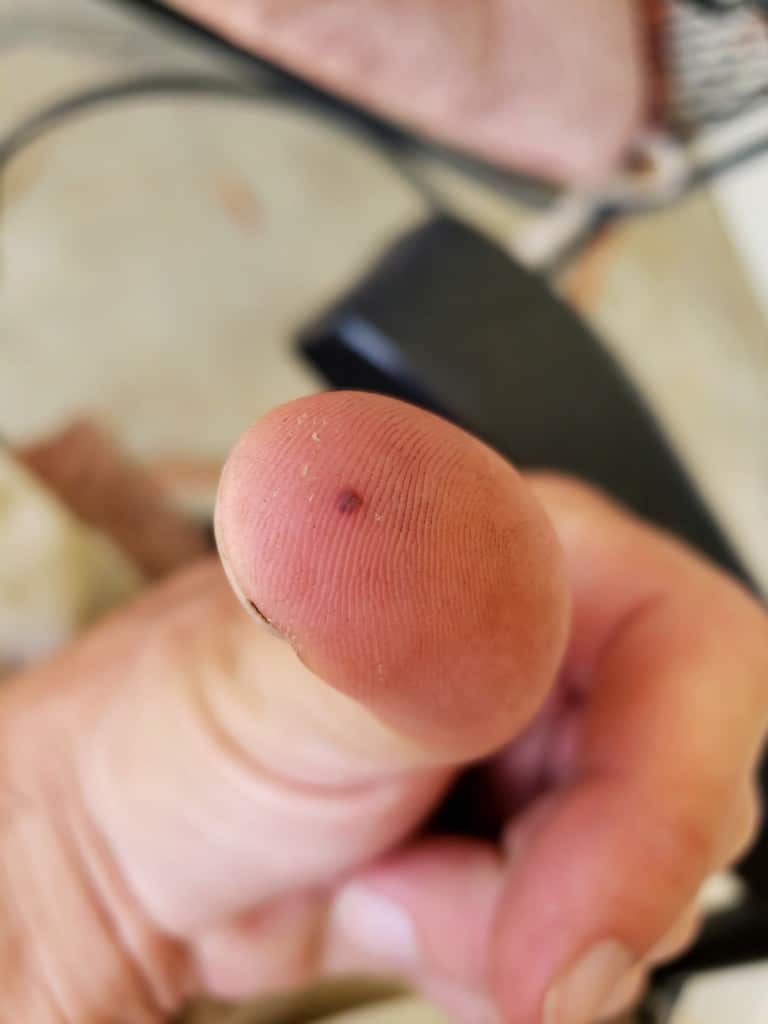
Even with self-drilling sheet metal screws, I had a lot of slippage. I’m pretty sure I had a green thumb of sorts. Or at least a blood blister between slipping and holding the spinning screws waiting for it to catch.
The first bed was done and it felt pretty successful. The other 2 were knocked out very fast in comparison to the first. It also helped I didn’t stop every moment to take photos.
With all beds assembled, they were easy to lift and put into place.
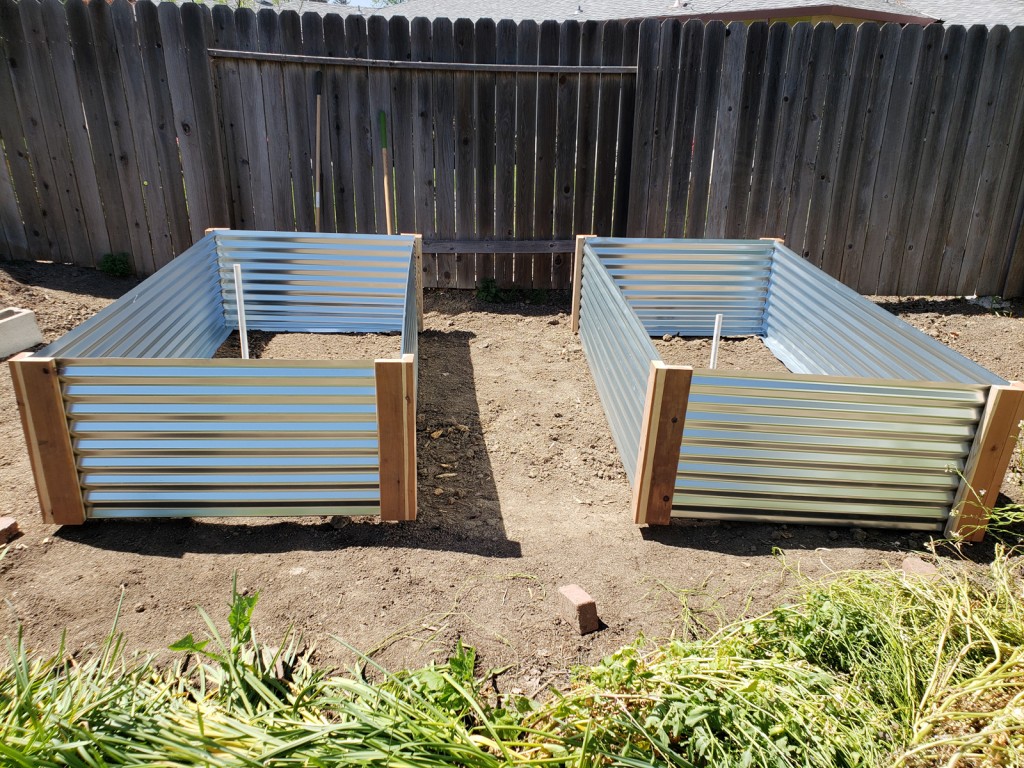
With the beds mostly in place, I grabbed a tape measure and perfected the placement with spacing.
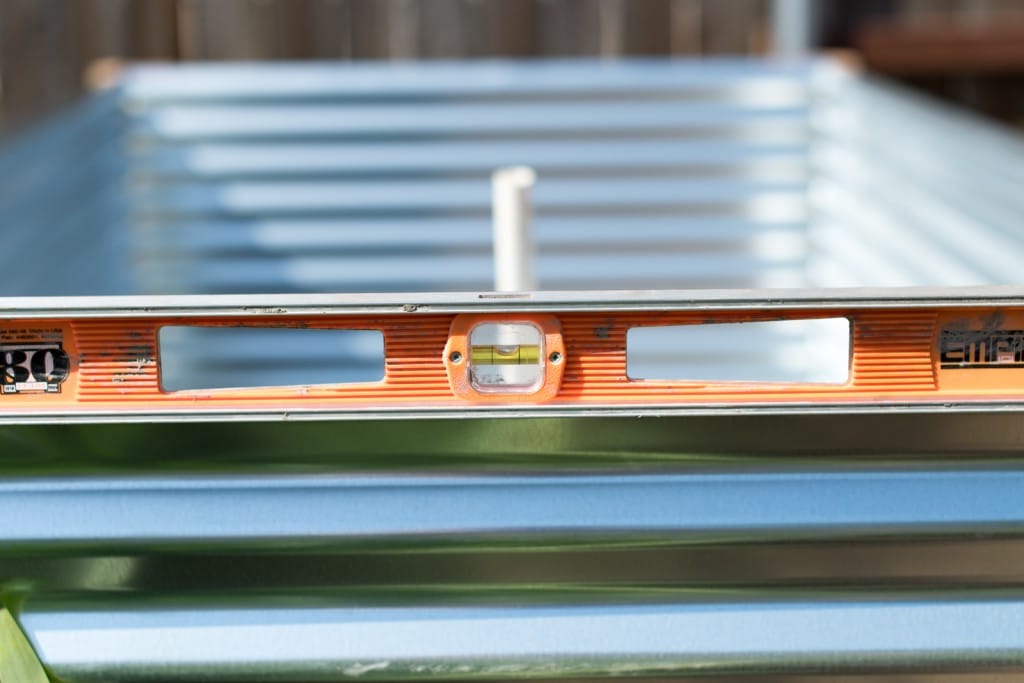
Okay, remember earlier how I mentioned after running irrigation, I was lazy on regrading the dirt? Yeah, this is what happened. Now, I was forced to level. So much for getting away from that.
Aiming for between the bubbles on the short side, a couple shovel-fulls of dirt later, a lot of harrumphs, the beds were ready for the next stage. Dirt.
Dirt Delivery
A local company delivered right into my driveway.
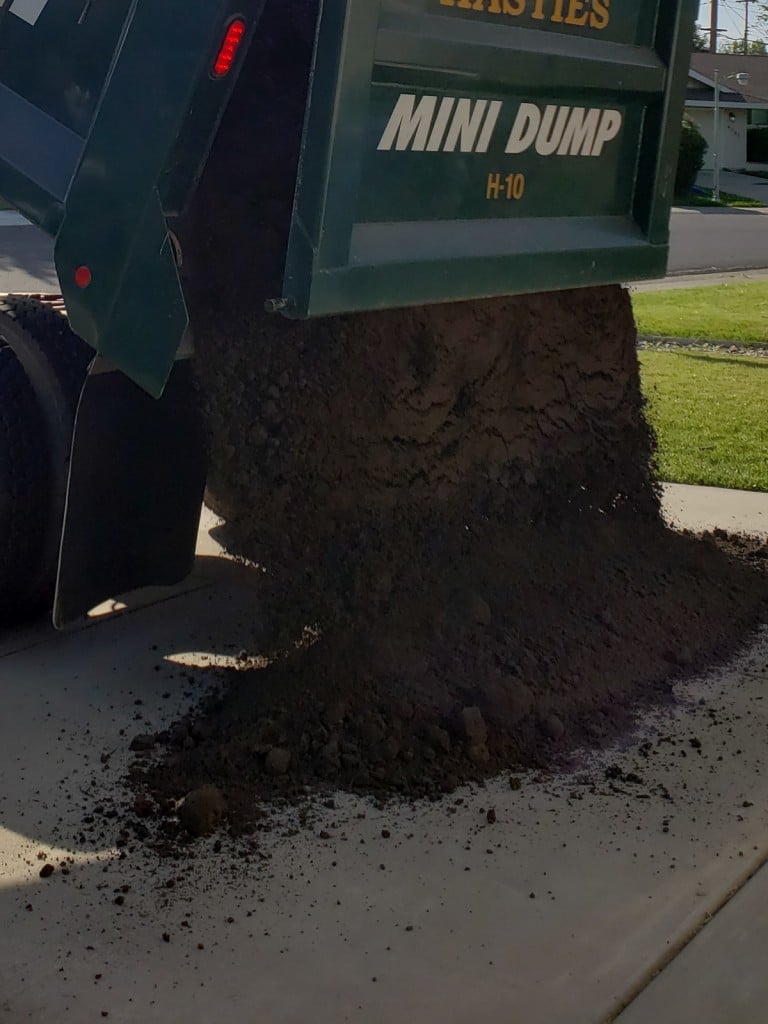
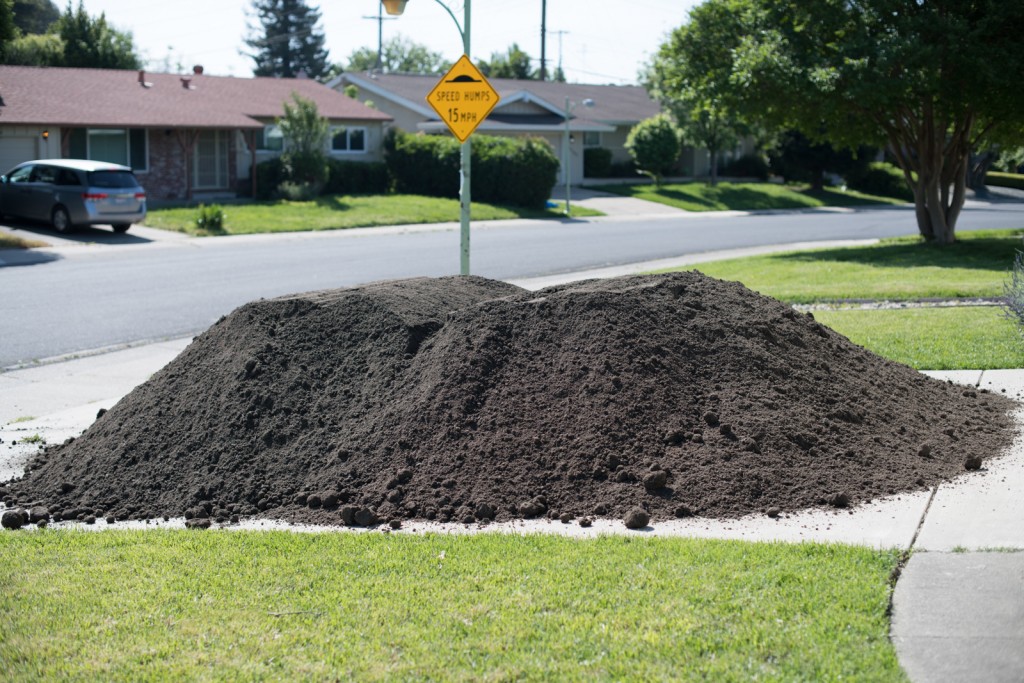
This is what 10 cubic yards of dirt looks like. I was quite pleased with unintentional sign placement alongside the dirt humps. If you recall from earlier, I needed 2.25 cubic yards per raised bed, and ordered additional for the rest of the yard.
The downside with creating beds that are 2 feet tall, is filling them with dirt required shoveling from the wheelbarrow to the bed. I could simply dump the wheelbarrow. I contemplated building a ramp, but due to space, I opted for a workout.
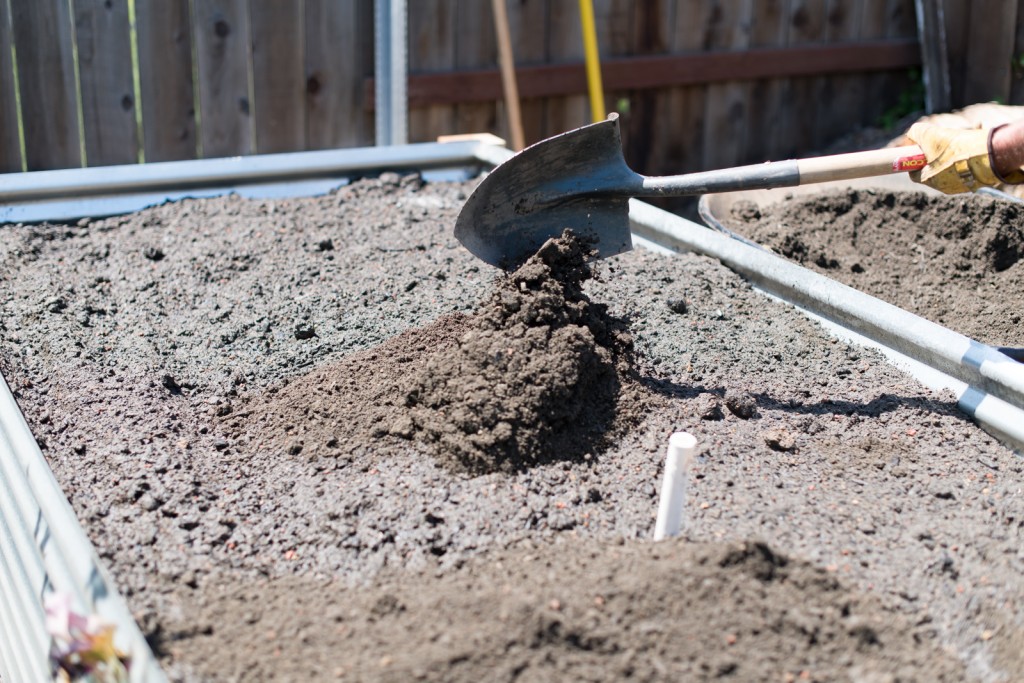
When filling the beds, in between each wheelbarrow’s worth of dirt, I sprayed it down with water. This would help with settling and keep the dirt from really going down once I had plants going on. I was incredibly pleased with how everything looked once the beds were full.
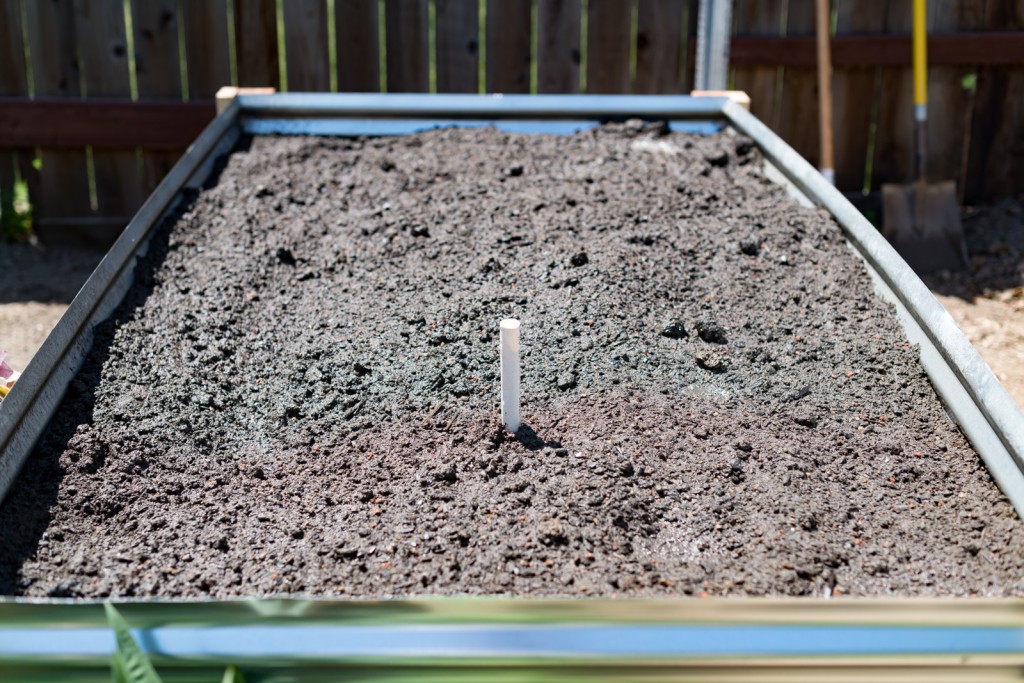
In researching this project, a lot of other blogs mentioned support systems and bulging for the sides. I opted for no such thing. Evaluating the sides and their bulge, I felt it was pretty minimal. Everything felt quite sturdy. I liked the seamless aesthetics over extra wood.
“Hey dad, can you fill this bed for me while I take some photos?” Is a line which worked well for one out of three raised beds.
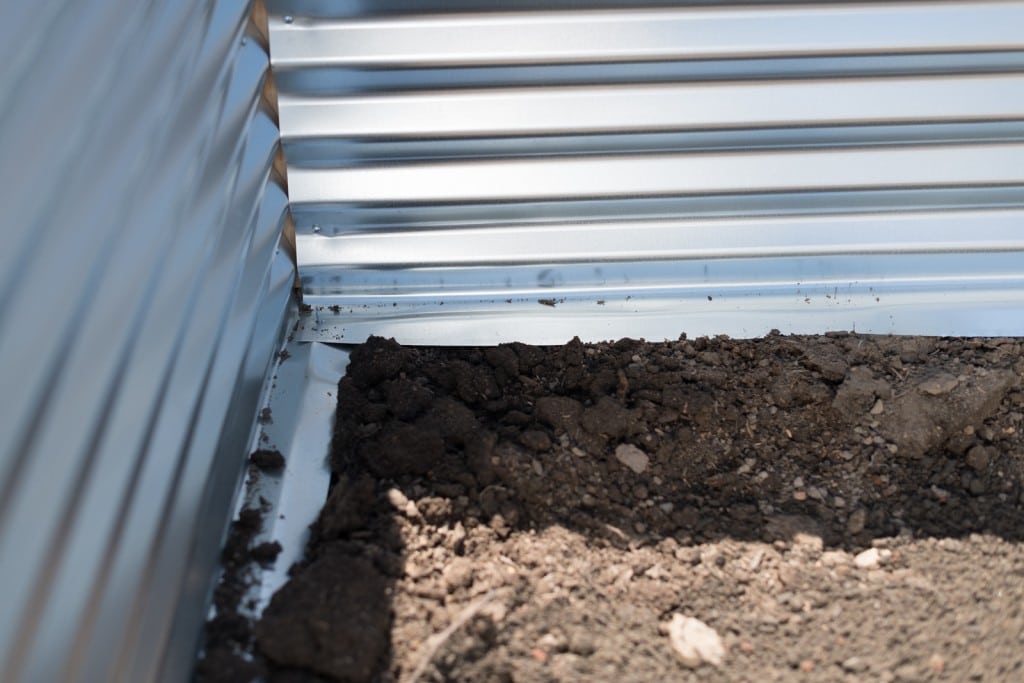
Those bent insides worked really well in holding the sides together and stable. Dirt rested on the lip and kept the metal from sliding outwards.
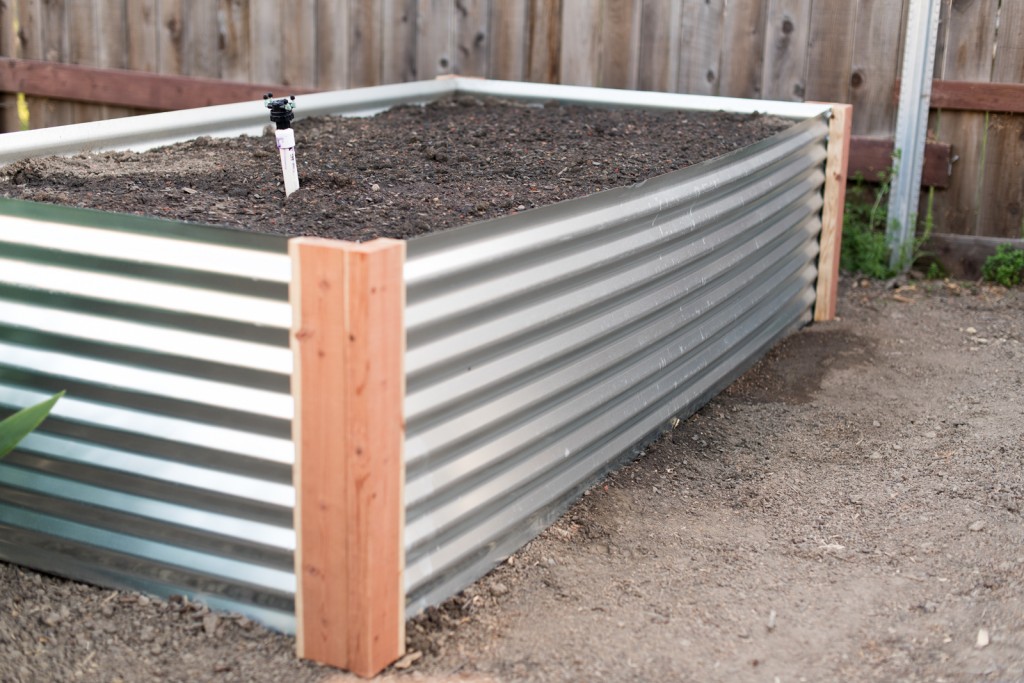
With everything filled, in place, and irrigation tops attached, I felt incredibly happy with how the beds turned out. They were beautiful. I couldn’t wait to start planting.
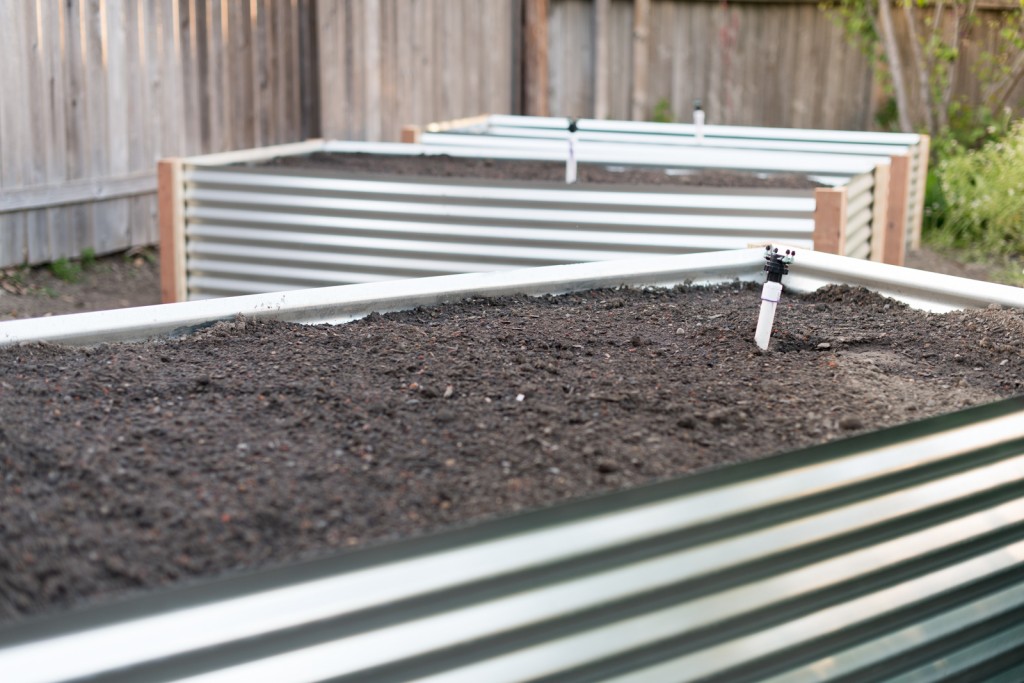
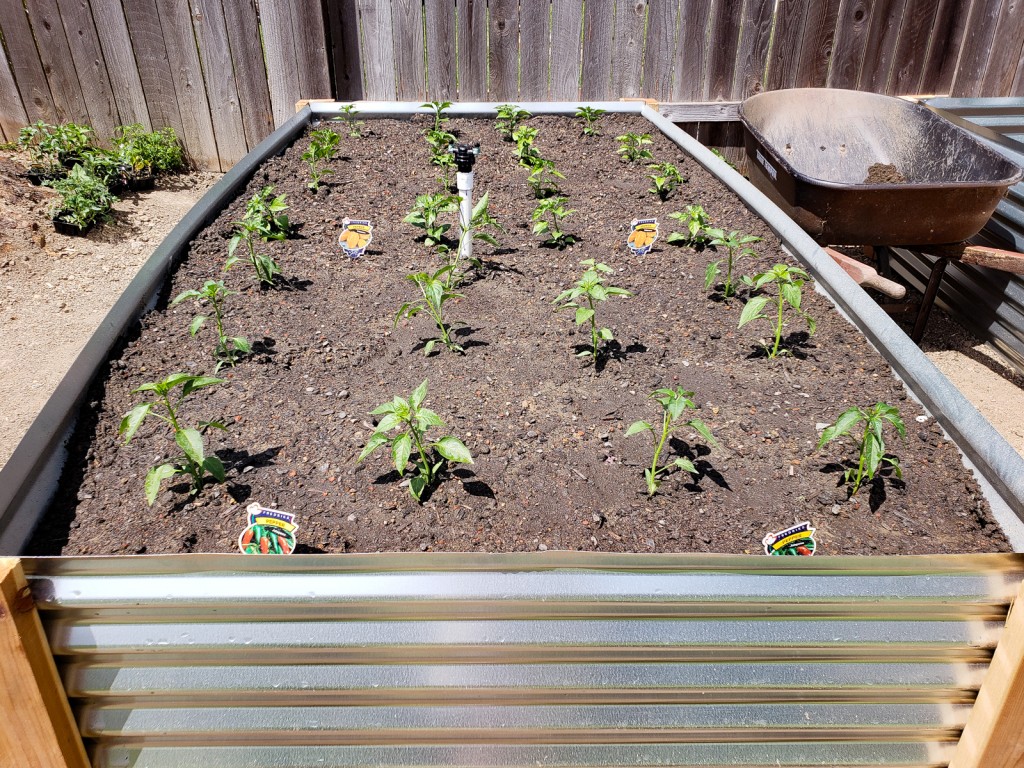
Bonus Round – Pavers Raised Bed
You might be wondering why the third bed is not aligned like the other two. Well, I happen to be the proud owner of a very large stump. I ran back to the store and picked up some pavers. I wanted to dry-lay a multi-tiered bed for larger plants to grow up into the stump and hide it. Doing tiers would also allow me to avoid mortaring.
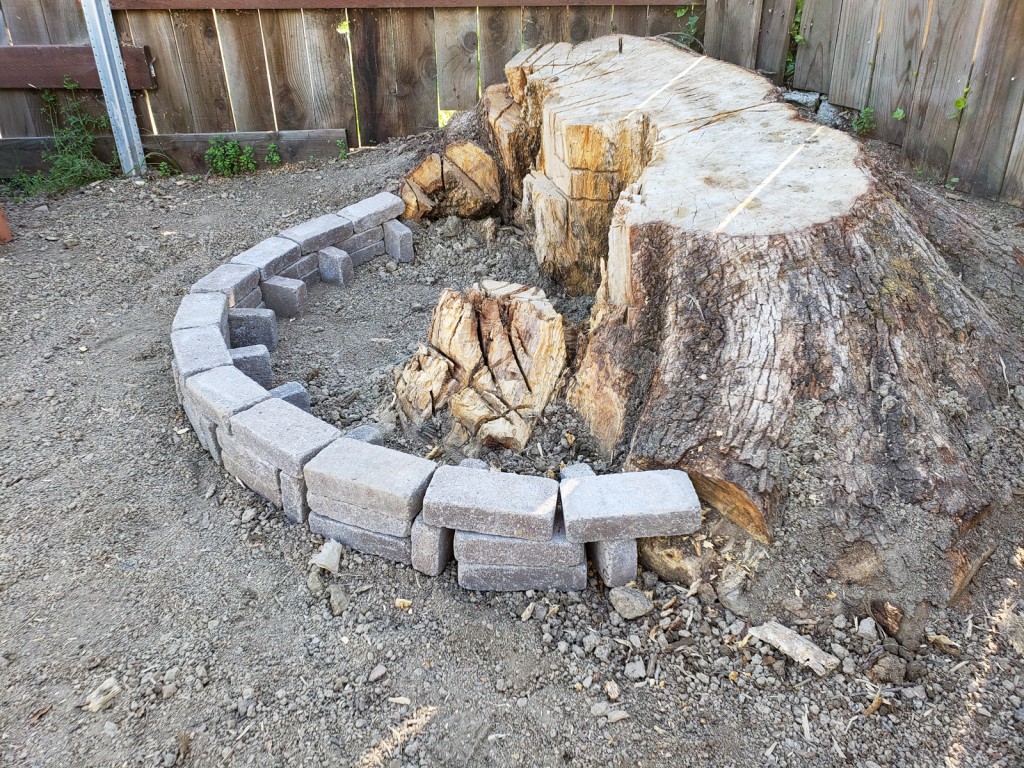
I had to play with a multitude of layouts and designs to figure out what worked and also allowed ample room between raised beds. This is what I ended up with for the bottom tier.
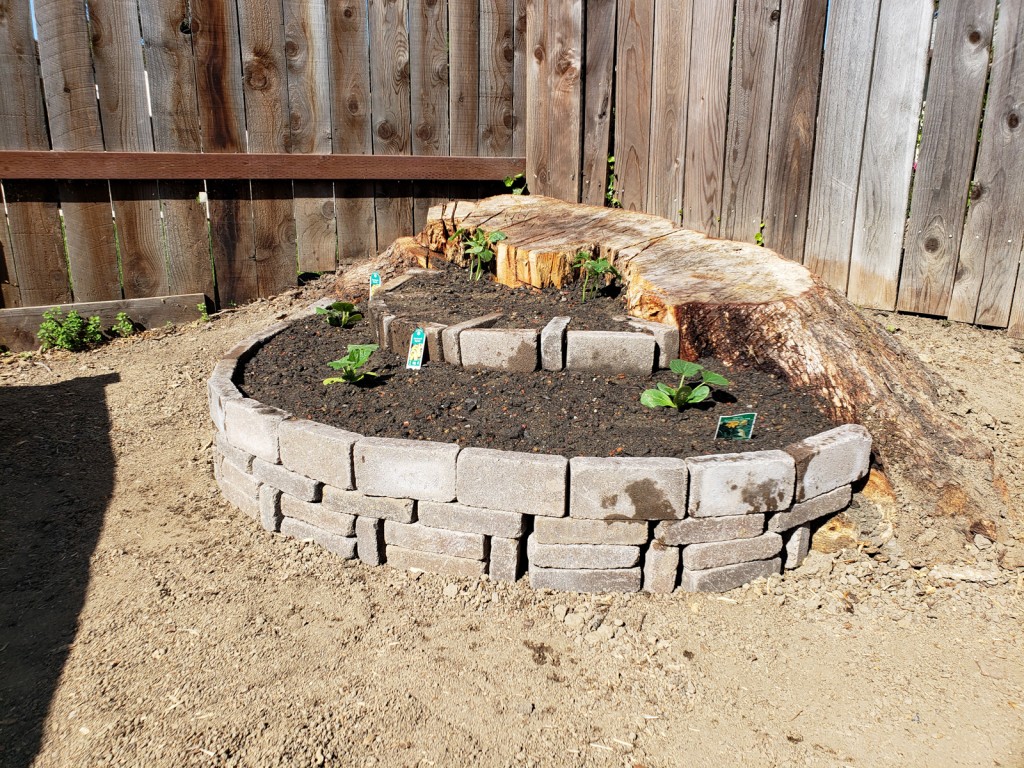
For the second tier, I simply placed the pavers on top of the dirt where they stand with their own free will. As much free will as pavers have, at least.
The Final DIY Corrugated Metal Raised Beds
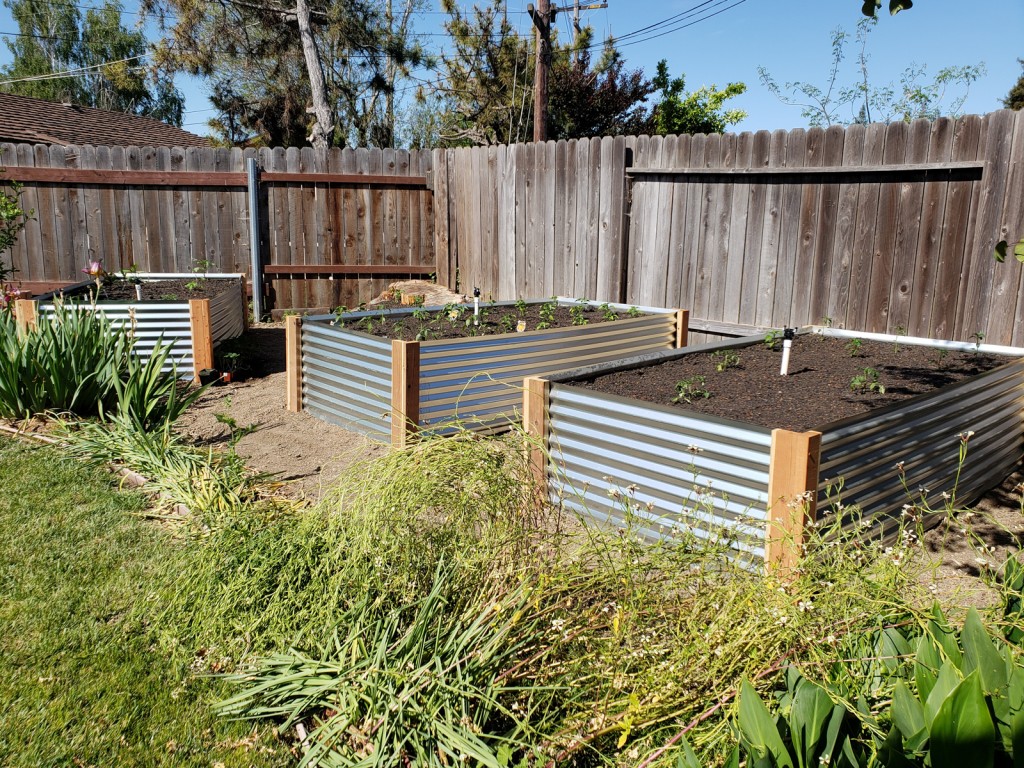
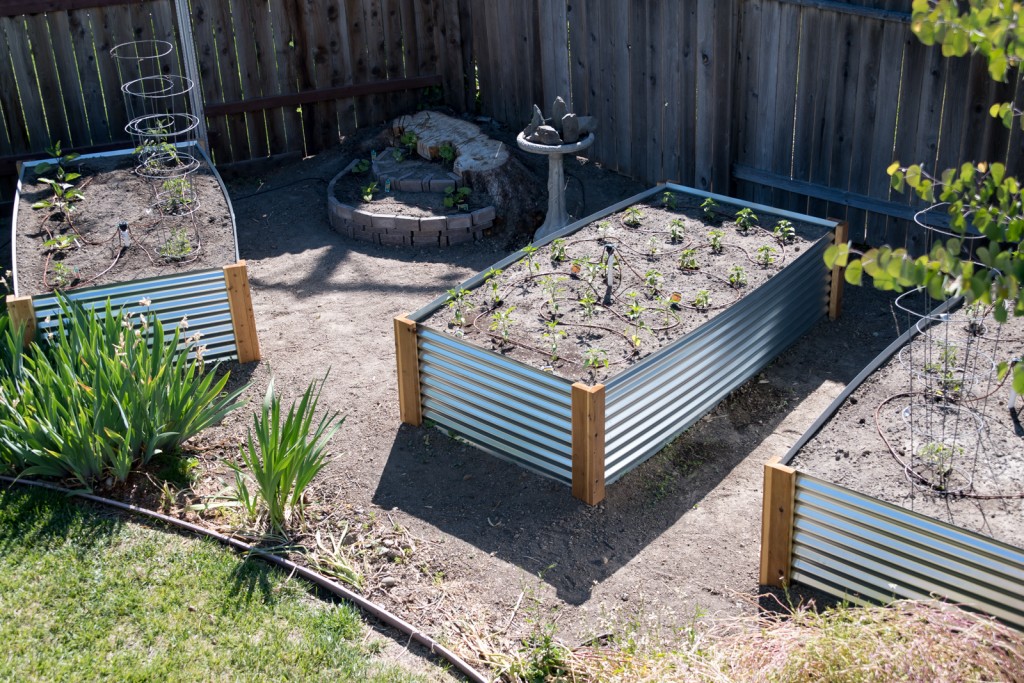
Finally! Please excuse my wild arugula and trampled bulbs. I am thoroughly thrilled with how the beds turned out. As an unexpected bonus, I have a couple of hummingbirds that come down and bathe when the irrigation is on.
One Year Later
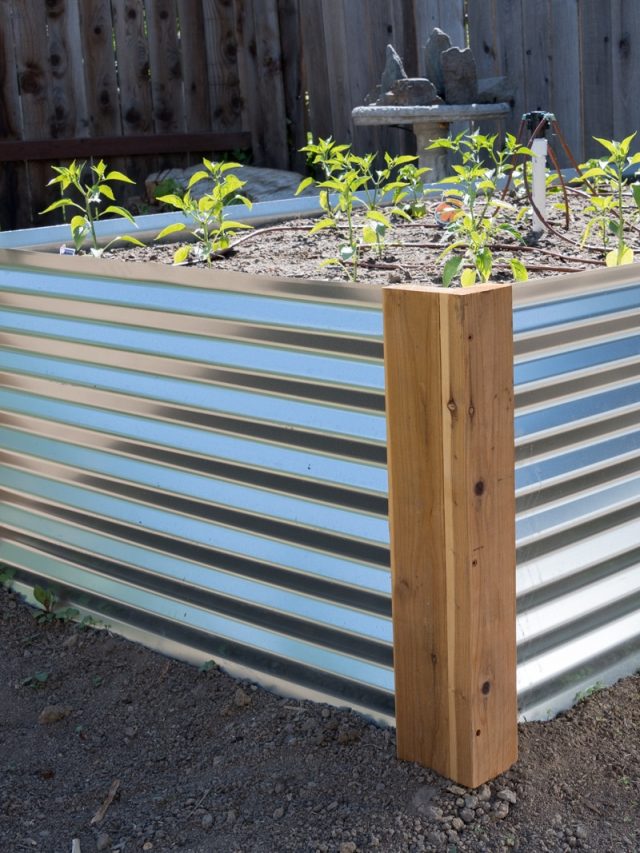
One year into using these beds – I am thrilled with them. Water retention is great. The metal never got too hot in the summer. The wood and shape stayed intact once the dirt settled as shown in the photos above during installation. This project was totally worth doing.
After building the mental raised bed, it always feels like the garden is missing something. Outdoor Neon Signs may be a good choice to add sophistication to the garden. Using some flowers and bird elements in the design, the breath of spring comes to the head.
- About the Author
- Latest Posts
I strive to paint vivid landscapes with my words, bringing the magic of far-off lands and enchanting aromas to life for my readers. Combine passion for exploration and the art of gastronomy in an unending ode to the senses. When I’m not traversing the globe, I find solace in the earth beneath my fingertips, tending to my garden and working on projects around my verdant oasis. MK Library serves as a beacon, guiding fellow travelers and homebodies alike to embrace sustainability, nurturing both our planet and our souls with purpose. Full Bio.




This is exactly what I’m planning to do with my spare sheet metal and timber.
How did you turn in the bottom of the sheets? Did you use any specific tool to bend them like that?
Thank you!!
I just used my hands and feet to bend. You might also use a 2×4 for the length.
Hi! Did you ever add the top railing out of wood like you mentioned? I am going to redo my existing 4 beds and make several more. I did not use the wood corners (had not seen your info) and of course the beds bowed out waaaay too much. Just wondering if the rail is around the top would be beneficial and how to do it correctly. Thank you!
I would do a top rail and either an additional vertical board on the long side or a 45 degree angled 1×4 on the inside thats hidden and attached to the corners.
I really enjoyed your informative and well-considered raised bed project. Wisdom is learning from someone else’s hard work. You did a great job of explaining your process in clear detail. Thank you so much.
A wise person, Mary Ellen
MaryEllen, Thank you so much for the kind words! Hope it helps in your own gardening endeavors.
What are the finished dimensions?