Learn how to run an optimal installation and use PhotoStructure for Synology Docker containers, also known as Container Manager. This guide makes use of Docker, and takes into consideration the needs of a working professional and separating Photo Libraries, such as one for work and one for family photos.

PhotoStructure is a self-hosted photo management program that provides cloud functionality while allowing you to keep data yours. It automatically organizes and deduplicates your photos utilizing lossless methods. System-agnostic, you can take your photo library and run it on Windows, Mac, Synology, Linux, or pretty much any other operating system you throw at it.
Table of Contents
What You Need
- PhotoStucture (Coupon MKLIBRARY10 for 10% off Plus)
- Synology NAS
- Container Manager (DSM 7.2.x+) Docker Package (DSM 7.2.x – DSM 6.2.x)
I want photo organization, but need to separate my work from personal photos. On my Synology NAS, I already have two Volumes and Shared Folders setup, where I have placed photos of each purpose. I have Photos, which is for my personal media, and F64, which contains all of my photography for hire related media.
The end result has 2 different PhotoStructure Docker containers running concurrently. Each can be accessed by changing the port, with 1787 being PhotoStructure’s default. 1788 isn’t used by any other service on my Synology, so I felt it safe to push the number up 1.
This method could easily be reproduced and adapted for additional Photo Libraries beyond the two.
Installing PhotoStructure in Container Manager
Open up Container Manager and click on the Registry tab. Type in PhotoStructure.
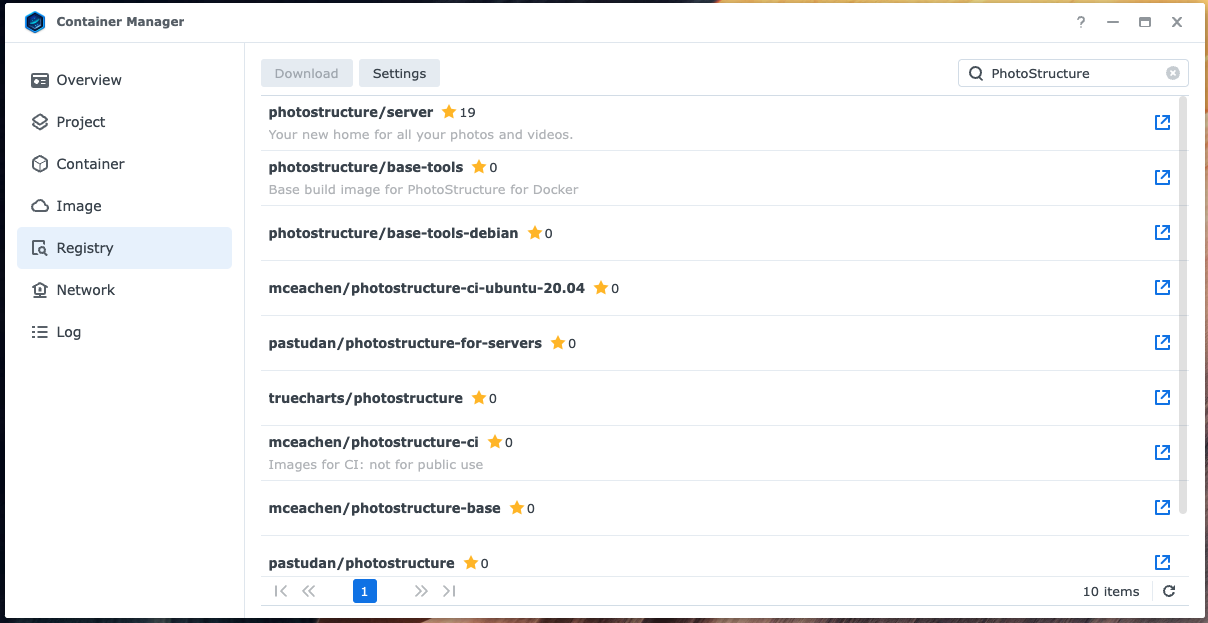
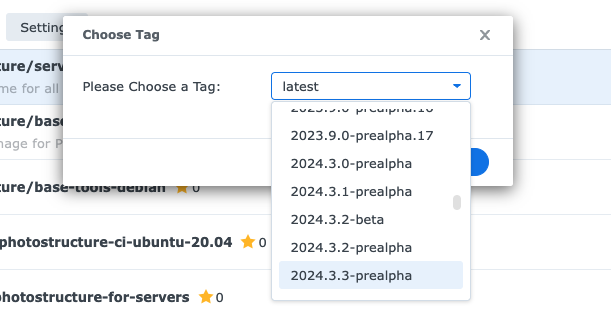
Double-click on the photostructure/server result. You can choose to either get the Latest tag, or if you’re adventurous and want to check out the newest photo management features, find the PreAlpha tag and get that.
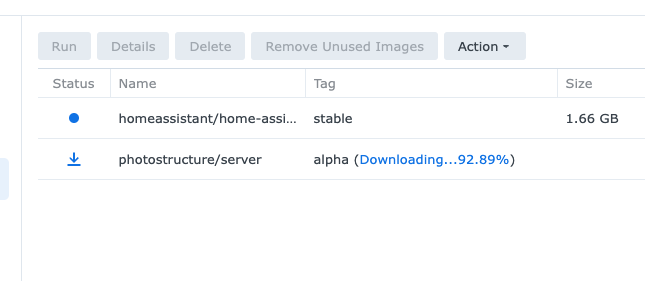
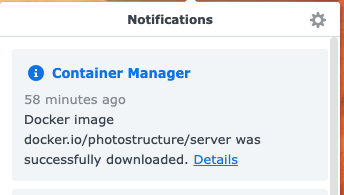
After hitting Apply, you’ll know the Image is ready when there is a notification from Container Manager. and the blue Downloading text gets to 100% and disappears.
Click on the Container Tab in the Container manager and Create a Container for PhotoStructure. These are my initial settings:

Docker Settings
Before you dive in, it’d be a great idea to review the official documentation on installing PhotoStructure for Servers.
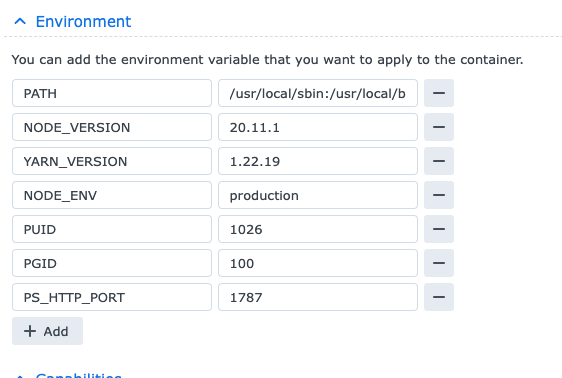
Here’s a screenshot of what my settings look like.
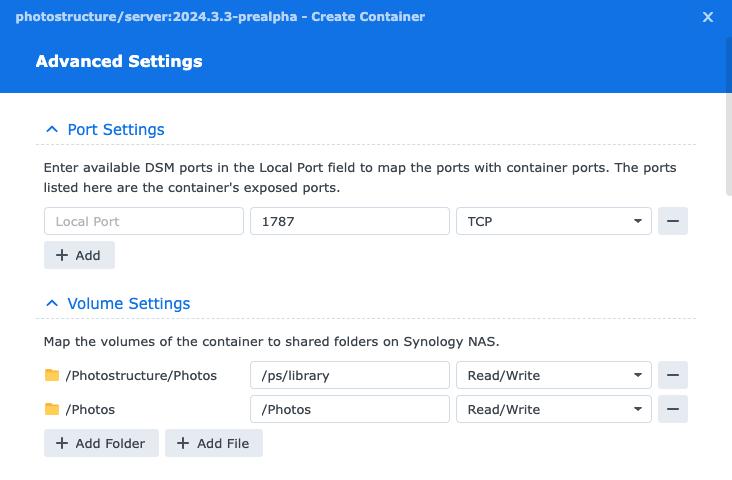
Port Settings:
Leave defaults. Ports will be changed through Advanced Settings directives.
Volume Settings Example
File/Folder: /docker/photostructure Mount Path: /ps/library
File/Folder: /Photos Mount Path: /Photos
Advanced Settings Example:
PUID needtofindforyou
PGID 100
PS_HTTP_PORT 1787
Advanced Settings Example:
I change my Network to Host, and it just remains simple for me. Only local access or access through Tailscale is allowed. If you know more than me about networking, then setup Bridge.
Shared Folder Settings
I discovered during a debugging session with PhotoStructure’s developer, Matt, that Shared Folders needed to have the specific user added to Permissions. Just having a group added to the Shared Folder may not be enough in a lot of use cases. Even if your user is the administrator.
As an added security measure, I created a new user called PhotoStructure and added the user to just the Volumes needed for the app to run.
From File Station, right-click on the Shared Folder with your photo library and click Properties. Hit the Permissions Tab, and then the Create button to add yourself as a specific user.
Make sure Read and Write permissions are granted.
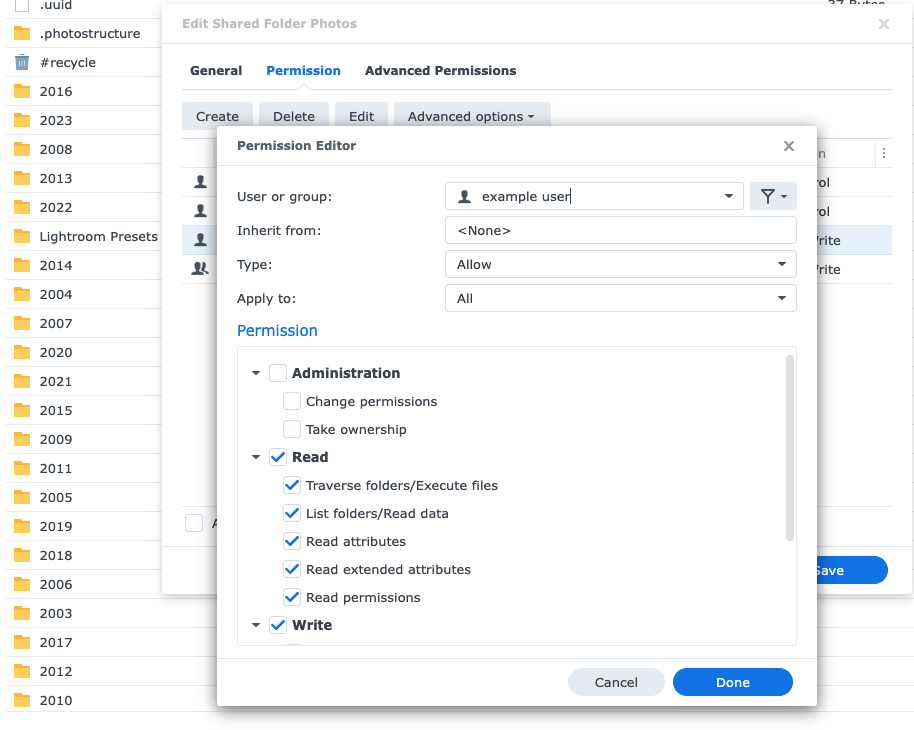
Hit Done on the Permission Editor Screen, hit the checkbox to Apply to all Folders/Subfolders/etc, then click Save. Wait for the permissions to be applied then move onto the next step.
Start or Run your Container, and it should show up with a green light and display info similar to this in General:
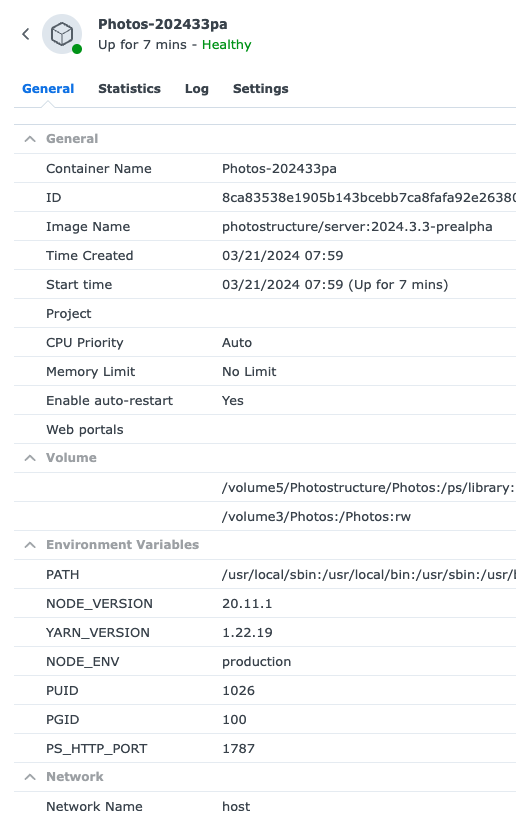
Go to the Health page of your PhotoStructure docker container, which will be at http://127.0.0.1:1787/health (replace your own IP), and it should look like this this next screenshot.
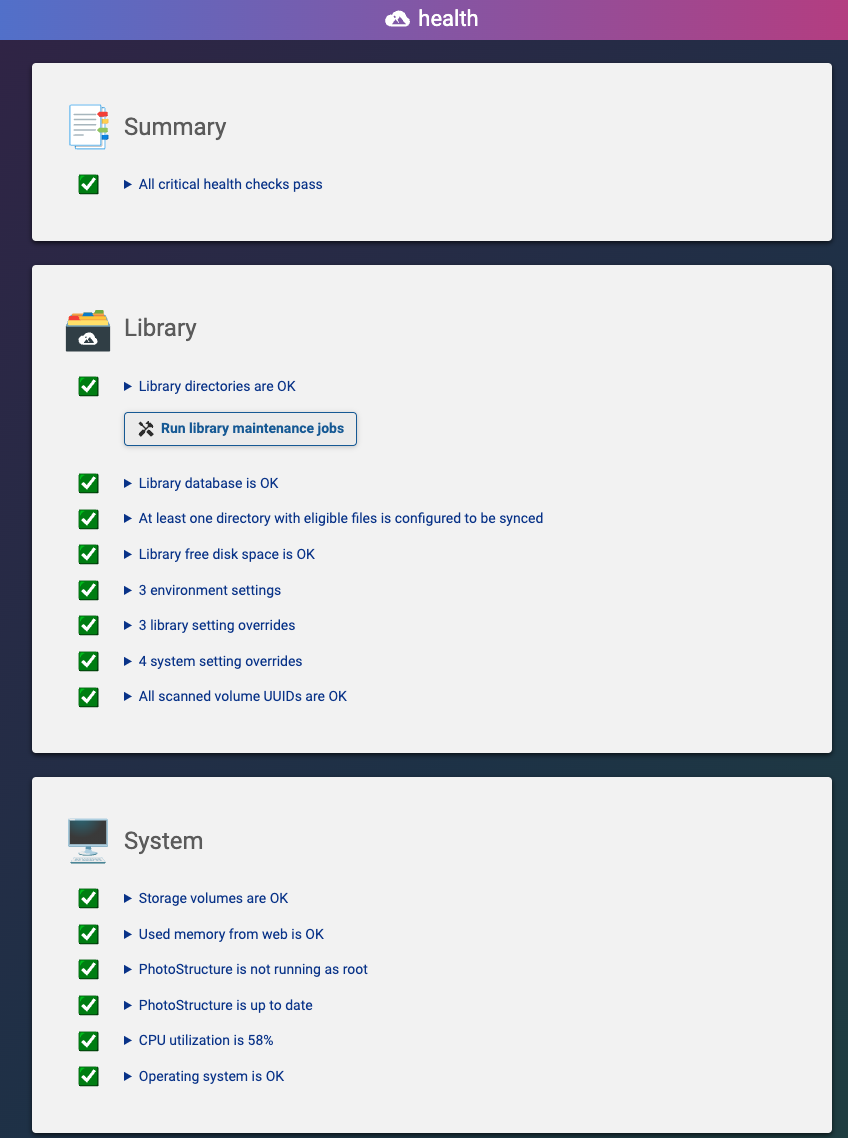
Setting Up the First Container
In the Advanced Settings, setting the PS_HTTP_PORT option and specifying volumes was key to differentiating between a first and second container.
Whether you plan on running one container, two, or more, having that set will allow you to quickly adapt to your needs.
The default port is 1787, which I specify as well, just so there is no confusion with Docker later on.
Setup the Second Container
There will be one minor difference as you set up the second Photo Library. Well, two. First, you will specify a different volume. The second is changing the port on your Environment Variables.
Here’s how my second container settings look:
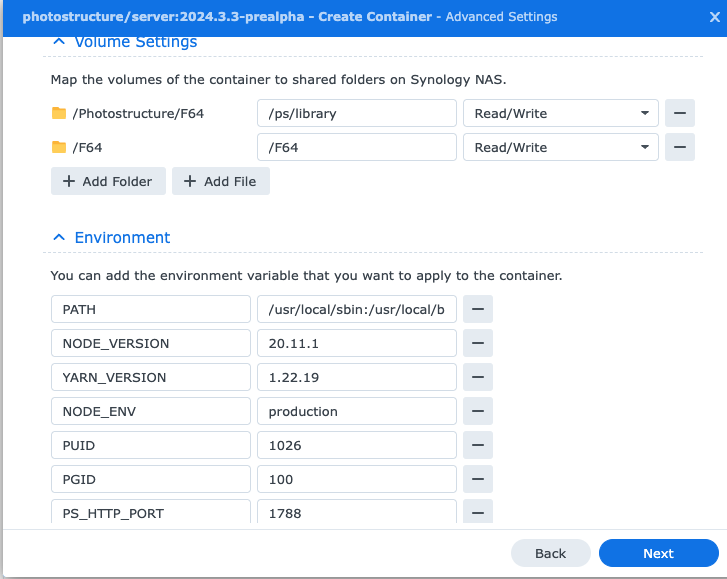
This modified Environment setting is key: PS_HTTP_PORT 1788
You’ll see my Volume settings are also changed. Both the PhotoStructure library folder and which photos are being pulled from.
The Volume settings are mapped to the second work Volume, so each Library and Docker files are on that particular volume. This allows me to totally separate Photo Libraries and settings, and quickly pick up and move around each one as needed. I can also access them from new systems without them ever interacting with one another.
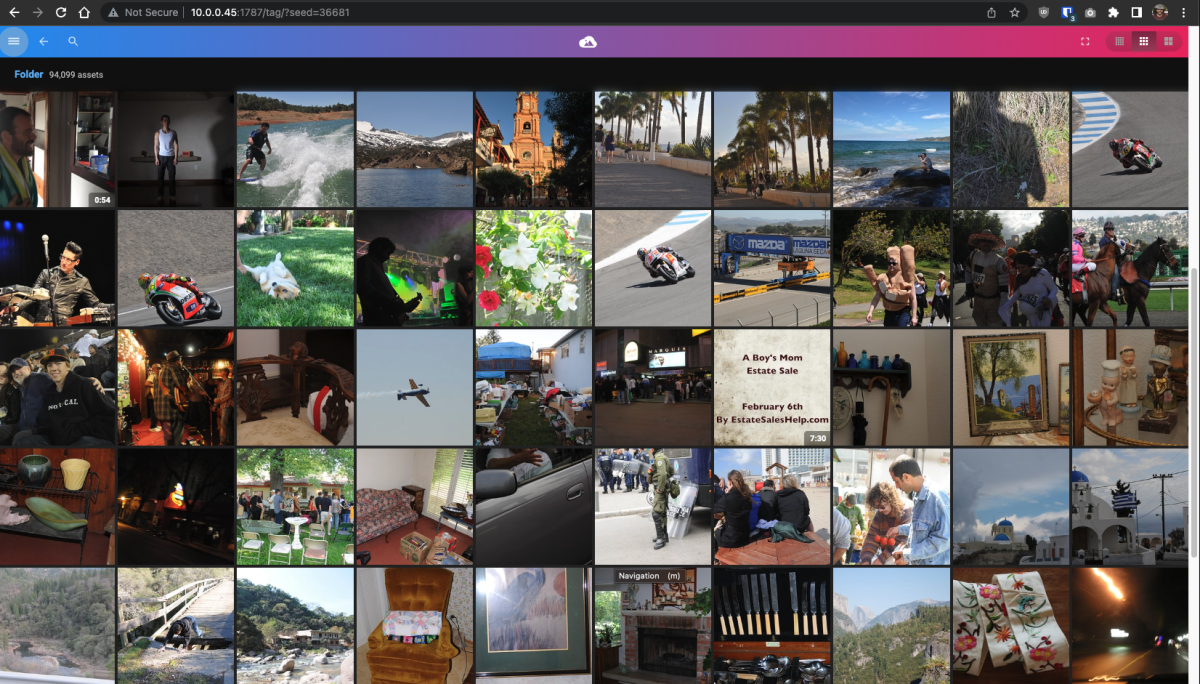
Performance
One of the best things I did was move the .photostructure folder onto its own SSD drive on my Synology NAS. My combined libraries of around 300k+ photos and video take about 2TB of data, so I bought a 4TB SSD SATA drive and moved the libraries onto that. Huge performance gains in browsing and loading thumbnails. I highly recommend doing the same if your setup allows.
Here’s my article on Synology NVMe Installation.
In watching how the two Docker containers perform, PhotoStucture does a great job in resource use and not overloading the server as it processes photos or video. I’ve noticed the two Libraries seem to go back and forth in using FFmpeg and other resources, with neither eating up everything at once.
I’ve been able to run everything else alongside PhotoStucture without any issues.
Sync is run every 24 hours, at 2am by default. If you make lots of changes to the folder structure on your own, you may want to restart sync manually.
If you’re interested in more photography tips and tricks or your workflow, check out the article on Camera Accessories.
Changelog
March 24 2024: Confirmed instructions are valid and work for version 2024.3.3 Beta.
March 21 2024: Updated with new images for Prealpha tags and newer versions. Verified all info is still valid and works as of 2024.3.3-prealpha and v2024.3.2-beta. Massively simplified the process thanks to improvements on PhotoStructure’s end. Had Matt@PhotoStructure review and approve my info. “…Thanks for all that work on that article, what I could read looked all good… What you’ve got is perfect”.
July 30 2023: Added Performance information on using SSD drives.
July 29 2023: Updated for Synology DSM 7.2.x and Container Manager.
April 22 2023: Guide last tested with Synology DSM 7.1.1.x Update 5.
April 5 2023: Guide last tested with Synology DSM 7.1.x and PhotoStucture 2.1.0-alpha.7.
April 2 2023: Updated Shared Folder settings.
February 16 2023: First published.
- About the Author
- Latest Posts
I strive to paint vivid landscapes with my words, bringing the magic of far-off lands and enchanting aromas to life for my readers. Combine passion for exploration and the art of gastronomy in an unending ode to the senses. When I’m not traversing the globe, I find solace in the earth beneath my fingertips, tending to my garden and working on projects around my verdant oasis. MK Library serves as a beacon, guiding fellow travelers and homebodies alike to embrace sustainability, nurturing both our planet and our souls with purpose. Full Bio.


